Showing posts with label book blog. Show all posts

Monday, November 19, 2012

Remodeling Hell For Only $3.00!

For a limited time only Irion Books is offering Divorce Hell, Remodeling Hell, Autograph Hell, Car Dealer Hell and Roadkill Cooking for Campers for the cost of mailing ONLY in exchange for an honest review!

We are more than happy to send the book media mail, which would be $3.00.  If interested, just Paypal your $3 payment to uspark@cox.net and we will get the book out to you right away!


Learn the history of divorce and how you can save your marriage with Divorce Hell!


Autograph Hell will reveal the true story behind autograph collecting, how to avoid getting caught up in "authentication" schemes and how to collect the right way.


Car Dealer Hell is a book anyone should read before buying a new car.  Full of inside knowledge that will help you avoid pitfalls and traps and walk into your next car buying experience armed and ready to take on any car salesman!


Save thousands of dollars and headaches with Remodeling Hell.  Even if you aren't planning a home remodel in the near future, there are many home remodeling tricks that can help you save several months in repairs and construction.


Roadkill Cooking for Campers - The Best Dang Wild Game Cookbook is the funniest cookbook in the world!  Learn how to cook anything from a moose nose to just Indian bread!  This cookbook makes for a great novelty gift for the outdoors lover and/or camper in your life! 


If you have any questions, please contact my assistant Jennifer at jennifer@irionbooks.com

Wednesday, May 16, 2012

5 Home Improvements That Won't Sell Your House

Here is a great article about upgrades to your house that won't sell it.  Take a look!  

If you remodel your house because you plan to live in it forever, then do whatever you want. But if you plan to remodel to help your resale value, beware of these projects.

Homeowners upgrade their homes for two reasons: They always dreamed of having a walk-in shower, or they think remodeling will boost their home’s value when it comes time to sell.

While the emotional value a remodeling project adds to a home usually pays off, unfortunately the monetary value rarely does.
Let’s face it, you’re not always going to recoup the money you spent on a remodeling project when it comes time to sell. Check out these examples to get an idea of what you shouldn’t do before you sell…

1. Adding a new facade to the exterior of your home

I live in a historic neighborhood comprising mostly of turn-of-the-century Craftsman Bungalows. A few years ago, adding a brick front over the original wood became all the rage in my neighborhood. Now it just looks out of place in the area. Last month, three houses went up for sale on my street – two with the brick facade and one with the original wood. The wood house sold right away while the brick fronts are still sitting there.

I’m not saying that was the reason why one house sold and the others didn’t, but spending the extra money sure didn’t seem to help. According to MSN, homes that stick out – like brick facades nestled among wood bungalows - won’t do anything for their value.

Alternative: While you should update the exterior of your home before you sell, stick with the original plans. For example, replacing weathered siding with the higher-end fiber-cement siding returned an average of 78 percent of what homeowners paid, according to Remodeling Magazine.

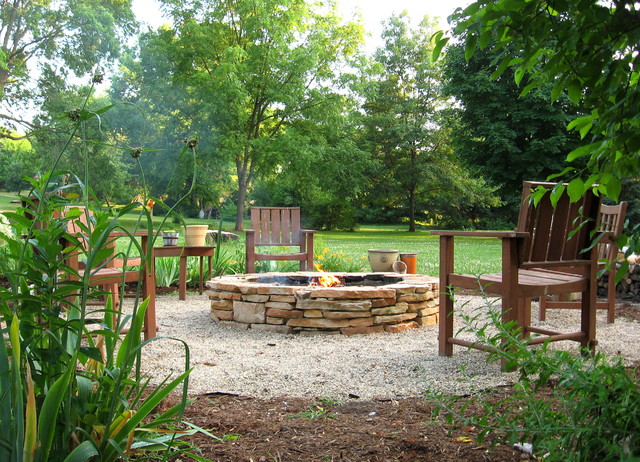
2. Putting in a pool

According to SmartMoney, adding an in-ground pool to your backyard won’t add any real value when it comes time to sell. In fact, large outdoor projects don’t typically appeal to a wide range of buyers. Most buyers would rather see an open yard space than a koi pond or 16-seater hot tub.

Alternative: 
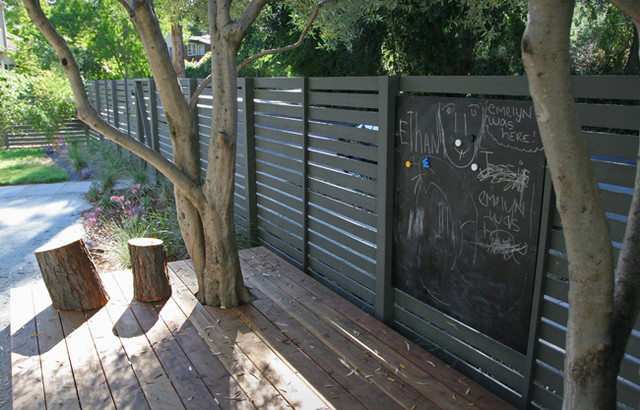
Clean up the yard and add some basic landscaping to the front and back. Having a nice yard gives your home curb appeal, and it’s one of the cheaper remodeling projects you can do. In fact, a study by HomeGain shows that the average landscaping job costs $540 and adds $1,932 to your home’s value.

3. Converting your attic to a home office

Converting attic space into a useable room will appeal to buyers – if it’s the right kind of room. Rooms like home offices only appeal to buyers who consider working from home a plus. In fact, HGTV reports that a home office remodel only recoups 60 to 73 percent of the cost on average.

Alternative: Converting your attic space into something that appeals to everyone, such as a bedroom. On average, homeowners saw up to a 90 percent return on this project, according to HGTV.

4. Overhauling your entire kitchen

Kitchens are the one room in the house that will appeal to the most buyers, so you want it to be eye-catching. But, that doesn’t mean you need granite counter tops, wood floors, and a double Viking oven to sell your house. On average, homeowners spent $110,938 on an upscale kitchen remodel. But the new kitchen only increased home values by $63,731 on average (or about 57 percent), according to MSNBC.

Alternative: Do a smaller-scale kitchen remodel, and focus on the areas that are the most outdated. As a comparison, MSNBC found that a smaller kitchen remodel cost $19,588 on average but raised the home’s value by an average 72 percent.

5. Installing solar panels

Green homes are becoming more popular, so making your home more energy-efficient will appeal to buyers. But the big greening projects are costly. For example, The New York Times reports that while the cost of solar panels has gone down by about 40 percent, one homeowner still paid a whopping $77,000 to install a solar panel system. It would be nearly impossible to recoup that investment in this housing market.

Alternative: Upgrade your windows with energy-efficient models – you’ll make your home more energy-efficient without the hefty price tag of those huge greening projects. Double-pane energy-efficient windows provide better insulation, which lowers utility bills – improvements that appeal to every buyer. And if you buy Energy Star-rated windows, you’ll qualify for a tax credit.

Questions to ask yourself

Before starting a remodeling project, consider these points…
1. Will this upgrade add value to my house? If you’re remodeling because you plan to eventually sell your home, run your ideas past a real estate agent or professional contractor. Not every project automatically adds value to a house.
2. How will my house compare to other homes in my neighborhood? If you put your house on the market the same time as five of your neighbors, your house needs to stand out – but not too much. Most buyers won’t consider your house if it’s priced much higher than others in the same area – even if your upgrades are worth the higher value.
3. Does this upgrade appeal to a wide range of buyers? If you’re going for a standard kitchen remodel, odds are it will appeal to almost every buyer who comes through your house. But, if you’re planning to break the mold with your home remodel, you might be wasting your money. Run your idea past a few friends and see if they’d buy it.


To order your copy of Remodeling Hell, CLICK HERE
For more information about the Summit Murder Mystery series, CLICK HERE

Article source: moneytalknews.com

Tuesday, May 8, 2012

10 Terrific DIY Home and Garden Projects

It has been a while since I've posted some DIY projects, and I came across these and thought I would share!  Add Spring panache inside your home and out with these engaging DIY projects for all skills levels.  From fixing up roadside furniture to installing an edible container garden and building a stone fire pit, these 10 DIY projects for the home and garden are for both newbies and pros!


Project: Painted quotation
Difficulty: Easy
Estimated time: 1 hour

The book Flea Market Chic by Liz Bauwens and Alexandra Campbell features a quote painted on the wall above a bed's headboard. You can easily re-create this poetic look with a small can of paint and a set of letter stencils — or very good handwriting.


  Project: Burlap-wrapped pots
Difficulty: Easy
Estimated time: 15 minutes

Jennifer of The Old Painted Cottage covered basic pots with burlap to enhance her maidenhair ferns. Buy a roll of burlap at a garden store, cut a section that fits your pot and place the stylishly covered pot in a plant stand. You can also finish the look by tying the burlap with twine.
Project: Two embellished paper lanterns
Difficulty: Easy
Estimated time: 20 minutes to 2 hours

Monica Ewing of Crafty Nest whipped up these delightful paper globe lanterns with nothing more than a glue gun and embellishments from a craft store. The flower design takes a bit more time, but you can finish the pom-pom creation in just minutes.

See the full instructions here
Project: Container garden
Difficulty: Easy
Estimated time: An afternoon

Want an edible garden in raised beds but don't have the time or desire to do major construction? Take a cue from the folks at Banyon Tree Design Studio and fill galvanized troughs (yes, the kind livestock drink from) with soil and compost, and use them as containers to plant your seeds.
Project: Reclaimed dining chairs
Difficulty: Moderate
Estimated time: 2 days (including drying time)

Monica Ewing of Crafty Nest scooped up these chairs for free on the side of the road and transformed them with black paint and decorative fabric.

This is a no-sew project, so it's even appropriate for newbie DIYers. Read the full details and how-to here.
Project: Stenciled rug
Difficulty: Moderate
Estimated time: 2 days

Upgrading a sisal rug with a modern print creates a fresh look that's inexpensive. Read more about this project here.
Project: Outdoor chalkboard
Difficulty: Moderate
Estimated time: 2 days

Shades of Green's portfolio on Houzz inspired me to research outdoor chalkboard DIY projects. I discovered the perfect method: Mix outdoor paint with a dark sanded grout and apply it to a sheet of plywood for a version that will hold up against the elements. Get the full how-to here.
Project: Front-door face-lift
Difficulty: Moderate
Estimated time: 2 days (includes drying time)

Designer Brian Patrick Flynn, aka the Decor Demon, upgraded a basic hollow-core door in a weekend with new hardware, fresh paint and crisp graphic design. It may look complicated, but with time and patience, even a beginner can tackle this project.

Read the full story with step-by-step instructions
Project: Placemat pillows
Difficulty: Moderate (sewing machine required)
Estimated time: Several hours

Living in a Nutshell by Janet Lee covers creative and budget-friendly projects for small spaces. Here's a genius tip from the book: Sew designer placemats together and fill with stuffing to create a pillow. Read the Houzz coverage of Living in a Nutshell for more ideas.
Project: Backyard fire pit
Difficulty: Hard
Estimated time: Several weekends (and helping hands)

If you are ready to bust out the power tools and do some heavy lifting, this stacked stone fire pit could be yours in time to enjoy warm summer nights. Erin Lang Norris did a wonderful job outlining step-by-step instructions, so if you decide to tackle this project, you are in good hands.
Source: www.houzz.com

To order your copy of Remodeling Hell, please CLICK HERE!
To read how you can help updating Remodeling Hell, please CLICK HERE
For more information about my Summit Murder Mystery series, please CLICK HERE!

Thursday, May 3, 2012

Home Remodeling Tips: Preventing and Cleaning up Dust

Remodeling your home is the hardest part, but keeping the dust and dirt down to a minimum and cleaning it up afterwards can also be a challenge. Find out some handy tips you can use to ease both tasks in this article!

Home remodeling projects can make your home look brighter and more attractive. They can also give you and your family much – needed additional living space. The down side of remodeling your home, though, is the plaster, wood and other dust particles that always result.  Not only does it make the interior of your home dirty, but an estimated thirty – five million Americans suffer from dust – related allergies, and you might be one of those sufferers. You can greatly prevent the amount of the dust particles in your house that is created during a home remodeling project, and relieve your allergy symptoms by following these simple tips:

Home remodeling tips: Preventing and cleaning up dust

Tip 1
When working on one room, isolate it in order to keep the rest of your home dust – free. To do this, close all of the doors that lead to any other rooms. Place old rugs at the bottoms of the doors so the dust cannot escape. If the room doesn’t have a door on it, moisten one or two old blankets with tap water and hang them in the doorway to cover it completely. The water in the blankets will help to trap dust particles and keep them from entering the rest of the house.

Tip 2
No matter if the heating or if the cooling system in your house is running or not, close the registers in the room you are remodeling. This action will keep your furnace or central air system from spreading the dust around the entire house. Then, after they are closed, moisten an old rug or towel with tap water and cover each register. This will prevent the dust from entering your registers and infiltrating your ductwork.

Tip 3
Immediately clean up any wood dust, plaster dust messes, et cetera, that you make during your remodeling. Don’t wait to clean up after you are done, because, the dust will be tracked through your house on the soles of people’s shoes, and it will filter through the air.

Tip 4
Always cut wood, drywall, plastic, metal, and all other materials that you may use in your remodeling project, outside in the fresh air away from your house. Cutting all of these materials creates dust particles that you don’t want floating around inside your home.

Using these tips can help to keep the amount of dust that a remodeling project creates in your home to a minimum. However, there will still be a certain amount of dust that is created from all of the activity involved.

Cleaning up the dust during and after a remodeling project can be relatively easy if you follow these tips:

Tip 1
The best device to use to clean up dust and other messes – either wet or dry – is a canister – type vacuum, such as a SHOP VAC. Don’t try to use your upright vacuum sweeper, because that will just blow the dust particles around in the air. A SHOP VAC is specially designed to pick up only dust, but also small pieces of materials. Picking up a small screw or nail won’t hurt this type of vacuum either, but it can ruin your vacuum sweeper.

Tip 2
Don’t use a broom to sweep up dirt and debris from the remodeling project. A broom creates an enormous amount of dust and dirt. If you have large pieces of remodeling materials to clean up, either pick them up by hand, or scoop them into a dustpan with your hand. If you have laid plastic down on the floor, simply fold up the corners of it and take it outside before you clean it off.

Tip 3
Trying to clean up dust with a dry rag is a futile task. All a dust rag does is simply puts the dust and dirt into the air. When the air settles down, the dust just re – settles again in a different area of the room. A more effective way to clean furniture and other wood surfaces, is to dampen a soft rag with furniture cleaner first. The dust will collect on the rag, and it will be removed from the air, as well as from the room. Turn the dust rag over when one side gets soiled, and replace it when it is thoroughly soiled.

For other home remodeling tips and tricks, order your copy of Remodeling Hell by CLICKING HERE!  

Article source: Newsolio.com

Tuesday, April 24, 2012

Remodeling Hell Giveaway

Win a copy of my book Remodeling Hell! Remodeling Hell describes my journey as I endeavored to build my dream home, which turned into a two-year nightmare. It's packed with money-saving tips and ideas.  This book contains often hilarious, but always valuable lessons of what to do and what NOT to do when building or remodeling homes. This book also contains a "Salvation Guide" 36 pages of remodeling guidelines that will save you time and potentially thousands of dollars. The valuable lessons in this book will help people as much today as it will in the future.

Fill out the form below using your 'tab' key to enter for a chance to win a copy of your own!  The contest will run  until the end of the month, with the winners contacted via email and announced here!  


Monday, April 16, 2012

Five Tips for Choosing a Kitchen Remodeling Company

There are many considerations when considering a partial or full remodel of your kitchen.  In addition to cabinetry and appliances, it’s good to think about the space itself, and how it meets your needs for space, food storage and preparation, and energy efficiency.  If your kitchen is a primary gathering place in your home for entertaining your family and friends, an update should include a focus on making this room an inviting spot as well. 
  1. What are your remodeling needs?  Even if you’re trying to replace outdated appliances, keep in mind that a new refrigerator, stove, hood, sink and microwave oven may be somewhat larger than your current appliances.  You may have to reconfigure the space of your kitchen to accommodate some, or all of these.  Also, Energy Star Appliances will add value to your home, and lower your energy costs while giving your home an EPA Environmentally Friendly upgrade.  Be sure to determine what your most basic needs for a remodel are–the “must haves” before you continue to the smaller renovations.
  2.  Plan your budget to include low-end, middle, and high-end renovations.  This will give your kitchen contractor a basis from which to work, and will open your options a great deal.  While you may not be able to afford a premium remodel, there are many opportunities to move funds within your budget to allow for some high end renovations while saving money in other less-crucial areas.  Explore all your options and choose a contractor who will work within your budget without trying to “up-sell you” on costly, often unnecessary upgrades.
  3. Interview two to three different companies and consider only companies that:
  • Offer many choices, styles, and brands
  • Provide free estimates
  • Understand your budget and show you the math to prove they know how to stay within it
  • Are licensed, bonded and insured, and provide numerous references from satisfied customers
  • Have experience in a variety of remodeling styles and approaches, including energy saving green building practices
  • Guarantee their work to completion on the projected date, and guarantee your complete satisfaction
  • Have received awards for excellence in design, service and customer satisfaction
4.  Keep it simple.  In order to avoid becoming overwhelmed with all of the choices that exist, narrow your search to companies that are local, highly rated for satisfaction, affordable while promising quality work within your budget and time frame, and who listen and communicate with you throughout the process.  Choose the company that understands your style, and with whom you feel most comfortable.
5.  Be flexible with your design plans.  Many kitchens can be designed various ways to accommodate your evolving needs.  Be sure to find a kitchen design company that can offer you many different floor plans, cabinetry designs, kitchen counter options, and appliances while staying within your budget.  A creative designer will help you think outside the box, and offer you the latest in affordable design choices, hardware, tile, flooring and appliances.  Knowing your personal style, favorite colors and preferences for appliances ahead of time certainly helps your designer in the initial consultation, but avoid being rigid.  Having several preferences can open the door to options, and may just save you money.

 For your copy of Remodeling Hell, CLICK HERE!

Monday, April 9, 2012

Women Leading the Way in a Man's World


    34t43t43t:   Justine Wood, of Justine Wood InteriorsWhile DIY may be traditionally seen as a man's work, a new survey says roles are being reversed with women leading the way and showing up their other halves' handy-work.

    The survey by the AA's Home Emergency Response Service has revealed men are losing their traditional DIY skills as more women step up and take over around the home.

    Young men are now less than half as likely to perform the tasks their fathers and grandfathers could, like rewiring a plug or bleeding a radiator. The findings show 35 per cent of men aged 18-24 can no longer change a light bulb, compared to 29 per cent of women the same age. It also states that women aged 18-24 are more competent than males of the same age at assembling flat pack furniture – 64 per cent against 54 per cent. Women are also catching up at hanging wallpaper, patching holes in a wall, and replacing locks.

    It seems this trend has been gathering momentum for some time, with females working professionally in male-dominated industries, including plumbing, construction and electrics.

    Justine Wood, 40, has been running her own successful painting and decorating business in Cheltenham for 14 years. After working several different jobs, she ended up painting almost by accident, but soon found her services in high demand.

    "I was taking a gap year and needed to earn some cash, so I started with the painting and decorating, and before I knew it I was working full-time.  It was quite unusual and people were surprised to see me at first, but in the last seven or eight years people don't seem to mention it," she said.

    Justine believes she brings things to the job which male firms cannot, and that there are many benefits to hiring a woman to work around the home.

    She said: "It's all about attention to detail, taking care and knowing you're working in somebody's home, not just a site. Where we come through is in applying those finishing touches, the little things that others may miss, and communication is important – letting people know what's happening as we go, rather than just turning up and getting on with things."

    Do you agree?  Do you think DIY repairs are no longer just a man's world?

    To order your copy of Remodeling Hell, CLICK HERE