Showing posts with label Home remodeling tips. Show all posts

Monday, January 20, 2014

Does DIY add to the value of your home?

Hi Everyone!  Welcome to today's blog post about DIY projects!  Did you know that I'm the author of not just one, but thirteen books?  For more information, please visit www.charlesirion.com, www.irionbooks.com and/or www.summitmurdermystery.com

Does DIY add to the value of your property?Wherever you look in the world, there are literally millions of people attempting do-it-yourself on their home properties and investment properties. If you know what you are doing, and you are confident in your own ability, there is the potential to add significant value to your property and make yourself some serious money. So, if DIY is so easy why do so many people fail to see the increase in the value of their property that they expected?

There are many reasons why DIY does not work for everybody, it is not as easy as it looks, there are potential pitfalls and the bottom line is that you need to know exactly what you are doing. We will now take a look at some of the issues surrounding DIY and why you should only attempt it if you are confident in your ability.


Simple DIY is easy
There are many different levels of do-it-yourself taking in anything from painting to roofing, from electrics to fitting a new bathroom and many more in between. When it comes to very simple tasks such as painting and “tidying up” a property to assist with a potential sale then this is something which is not out of the reach of the vast majority of homeowners. You would be surprised to learn how big an impact a simple “tidy up” and repainting job can have on the saleability of your home – making your property more “easy on the eye”

Medium level DIY
We then move on to the medium risk DIY projects which take in the likes of flooring, replacing tiles, wallpapering and other similar tasks. On the surface, again, this type of project seems fairly simple but have you ever tried to lay flooring? Are you confident climbing ladders and replacing tiles? Are your wallpapering skills as good as you think they are?

When we move towards medium level DIY this is an area which can have a detrimental impact upon the value of your property, its saleability and can actually impact upon your finances. If you make a hash of replacing flooring, replacing tiles, wallpapering, etc then the likelihood is that you will need to call in the experts at some point at further expense. Indeed, if you have made a mess of your medium level DIY then it can actually cost more to put it right than it would have to bring in the experts from day one. Nothing is ever as simple as it seems where DIY is involved!

High level DIY
DIY projects such as installing gas equipment, rewiring your home, fixing new lights and fitting a new roof to name but a few are high-level DIY projects which require professional skills. There are many tasks in the DIY arena which experts would think twice about tackling unless they have specific focused skills in the relevant areas. Just because you can wire plug does not mean you can rewire your home, just because you can fit a few tiles does not mean you can fit a new roof. You also need to take into account the safety aspect, the fact that tackling electrical, gas and other challenging DIY activities can not only place you in danger but also those around you.

If you are looking at any level of DIY on your property you need to make sure you have the experience, the expertise and perhaps just as importantly, the right tools. Many people will make a success of their DIY projects, they may well add a significant amount of money to the value of their property but there are more people who make a mess of their DIY projects and end up paying more to get their mistakes corrected!


To order your copy of Remodeling Hell, CLICK HERE
For more information about Remodeling Hell, CLICK HERE
For more information about the Summit Murder Mystery series, CLICK HERE
Follow me on TWITTER
Friend me on FACEBOOK
Follow me on PINTEREST

Tuesday, January 7, 2014

Renovation Solutions: Survival tips for living while remodeling


The Smiths, a family of eight survived fairly extensive renovations while living in their split home throughout the construction process.  Their remodel included an addition of 400 square feet to both the main and lower levels, creating a great room (family room, dining area and kitchen) on the main level and a secondary family room below.  As much as they tried to keep the construction zone contained, living in a home that is being remodeled disturbs the rest of the house and how a family lives. Tiffany Smith offers some insight into how she survived living through the remodel with her small children.

Deciding to stay, The Smiths broke ground for the project when the youngest of their six children was 7 months old. It took almost a year to complete the construction, and they lived through it, literally, right in the midst of the construction zone.

Many families stay in their home during a remodel. One common reason is the budget.  On one hand, if a family moves out, they can theoretically save money because the contractor can get the job done faster (and therefore more cheaply) if they don't have to work around a family.  On the other hand, the cost of a temporary apartment or a condo tends to eat up any such savings.  For the Smiths, it was a hard decision. "I thought about this so much," Smith said. Even now that the remodel is finished, she has gone back and crunched the numbers again.  "Would it cost more to stay, or is it cheaper to move out? Honestly, I still don't know."

Ultimately, they stayed because they didn't want to uproot everyone. "Even though it was a weird construction phase, the kids were sleeping in their own beds," Smith said. It was a constant among the chaos.

Stay organized (as much as possible)
The problem with staying in the house during a remodel is that it is almost like moving but you don't go anywhere.  You still have to pack boxes. Everything from the areas to be remodeled has to go somewhere else during construction. The Smiths used a storage shed for some boxes, but most of the stuff ended up stacked in the den and the master bedroom.  "Our master bedroom was the catchall," Smith said. "Everything had to go somewhere, and our room was floor-to-ceiling with boxes. I don't know how we survived it."

Check in with reality
The reality is that remodeling is messy, noisy and stressful.  "So many people prepared me," she said. "They warned me about the constant mess and the constant dust. They said you just have to grin and bear it, and in the end you will be grateful. They warned me that those days are going to come where you are going to cry and say, 'How in the world are we living here?'  So, when those days came, she was prepared for them. "There were only two or three days when I threw up my arms and said, 'I can't stand this; I want my house back!' And that was pretty good for me."


Getting over the no-kitchen blues
Surviving three months without a kitchen is not easy, especially when you have a family of hungry children.  The Smiths' secret: lots of microwaveable and slow-cooker meals. Smith says one thing that saved her was that her older kids were back in school during the time when they had no kitchen.
“That way, I didn't have to worry about all three meals for all the kids,” she said. “Breakfast is easy — toast, cereal or oatmeal in the microwave. For lunch, the older kids would be in school so I would only have the younger kids to worry about. They were so young, they won't even remember how bad it was.”

Make as many decisions as you can upfront: Smith says it took a year to get all the plans and specifications done. She worked with the architect and an interior designer to finalize all the specifications. "I made 95 percent of all the decisions before we even dug the hole," she said.
"I didn't want to make any last-minute decisions. I knew with my family responsibilities I wasn't going to have the luxury of going out and pricing items that the contractor needed the next day."
At the same time, because she was living in the house, she was accessible for the contractor when there was a question. “Being on-site made it easy to meet with my contractor," she said. "I didn't have to pack up the kids to go talk to the contractor for 15 minutes."

Think safety
When you are living in your home during a remodel, safety comes first.  "Safety definitely was a concern," Smith said. "You have to make sure the job is cleaned up every day and that there are no nails lying around. We had a really great contractor who was always good about keeping his job site clean.” The family has a responsibility to stay out of the construction zone for the duration of the remodel no matter how much they may need that space.

Overall, living in your home during a remodel is not easy. It will take patience and a good attitude. “Sometimes we just needed to pack up and go to the park," Smith said.

"My attitude was, 'Just grin and bear it.' I knew it was going to be worth it in the end, and it was. It was all worth it.”

To order your copy of Remodeling Hell, CLICK HERE
For more information about Remodeling Hell, CLICK HERE
For more information about the Summit Murder Mystery series, CLICK HERE
Follow me on TWITTER
Friend me on FACEBOOK
Follow me on PINTEREST
Article source: desertnews.com 

Wednesday, November 20, 2013

10 Essential Tips for Designing the Bathroom by Sarah Lonsdale

Great article worth a share from Remodelista!

Among the many highlights of his Malcolm Davis of Malcolm Davis Architechtur projects? The bathrooms, which are light, airy, and full of well-considered details. So who better to turn to for advice?

Remodelista: What do your clients typically ask for in a bathroom?
Malcolm Davis: When someone comes to me, they usually know what bathrooms I design; there's always some sense of the outdoors and as much daylight as possible. When clients start looking at imagery, I ask them to think of their house as the best version of what they want it to be and what look will go with that in the bathroom, as opposed to their dream bathroom. I try and have a thread of the rest of the house incorporated in the bathroom so it feels connected.
Malcolm Davis Architecture indoor-outdoor shower: Remodelista
Above: A marble-clad shower with an obscure-glass (frosted) door that opens on to a wooden roof deck and a small window looking onto the trees outside.

RM: How do you manage to make your bathrooms so light and airy?
MD: If I have any way of getting daylight into the bathroom, I do it. I always try and get a bathroom on an outside wall. In a city, you don't always get that option, so then I go for a skylight. It's important to have a visual link to the outdoors; it's neat to have some clear glimpse of the outside, even if it is just one panel of a window where you can see a tree outside or a skylight where a bird flies overhead. The more light the better. Sunlight is the best killer of mold. If you can make the windows larger that's the biggest change you can make.
Malcolm Davis Architecture modern bathroom: Remodelista
Above: A Davis-designed bathroom at the Cook residence in SF.

RM: What's your approach to design?
MD: I like some bandwidth in the bathroom. It needs to be a place where if you are putting yourself together you can be the most spot on, but it's also a place where if you feel terrible you can unwind in warm water and find some solace. The bathroom has to provide a good backdrop, and not work against you. It should convey a sense of simplicity and clarity.

RM: How do you create a serene backdrop?
MD: I use simple, nice materials and work with a limited palette. I really like limestone, marble, and slate. I like to bring in some sense of nature, a piece of natural wood or a Heath tile that has a handmade quality. I use a wood shelf in a lot of bathrooms. If the surfaces feel too hard and shiny, it can feel too perfect. With materials that have a softer organic feel, that's when the person starts to feel they fit in.
Malcolm Davis Architecture Bathroom: Remodelista
Above: Baird Street project. Davis explains, "A tabletop is at 30 inches so the sink needs to be higher so you don't have to bend over so much. I usually have the sink height at 34 to 36 inches high, although I am currently doing a gentleman's sink that's higher."

RM: Storage?
MD: I like hidden storage (there's something about having a million little cupboards that looks overwhelming). I like to place a couple of tall shallow cabinets hidden in a stud bay. You don't need deep shelf storage, a shallow shelf can store a lot. I try and make as many things as dual function as possible. I like to put a recess in the shower and I try and integrate towel bars to feel built in. It's hard to pull off as it depends upon the space
Malcolm Davis Architecture running bond tiled bathrrom; Remodelista
Above: Davis favors plain ceramic tiles in a running bond pattern as opposed to stacked shown here in the Bole project. When using darker tiles he prefers the contrast of a lighter grout
.
RM: Choice of materials?
MD: A bathroom is going to last for a long time, so I like to keep it simple. It's not clothing. When it comes to materials, I always question whether it will last for a long time. I advise clients to set out a couple of materials they like and look at them every day before deciding. Often it's the one that you thought that was boring that works in the end.
Malcolm Davis Architecture slate wall bathrrom; Remodelista
Above: In this 21st Street project, Davis notes, "I use porches a lot in my mental vocabulary where people may think that this could have been an outdoor space that has been closed".

RM: Lighting?
MD: Industrial-looking Stonco lighting is my go-to. It's a vapor tight light with a guard and they are great for tucking in a skylight shaft.
Malcolm Davis Architecture Bathroom: Remodelista
Above: 28th Street project.

RM: Favorite fixtures?
MD: I like porcelain. Duravit sinks are a favorite, and the Dornbracht Tara line is super classic, although sometimes it can be a challenge to get the hot and cold taps to line up straight. I like Chicago Faucets, but it's too bad they don't have a bigger line.
Malcolm Davis Architecture green tiled bathrrom; Remodelista
Storage: A bathroom unit with a built in towel rail in the Bartlett project.

RM: Things to note?
MD: Bathrooms don't have to be huge. When I see a large standalone tub floating in space, that's a lot of space it's taking up. I always put my mind into the small places of New York or Europe and consider how you make a space compelling.


To order your copy of Remodeling Hell, CLICK HERE
For more information about Remodeling Hell, CLICK HERE
For more information about the Summit Murder Mystery series, CLICK HERE
Follow me on TWITTER
Friend me on FACEBOOK
Follow me on PINTEREST
 
 Article source: remodelista.com

Thursday, February 21, 2013

Places to Look for Home Remodel Ideas

Thanks for reading today's blog post!  Did you know that I'm the author of not just one, but thirteen books?  For more information, please visit www.charlesirion.com, www.irionbooks.com and/or www.summitmurdermystery.com

Great article about inspirations places that may give you ideas for your home remodel!

Are you thinking about remodeling your home, but don't know where to start? By hiring a professional, you can be assured that you will get what you are looking for in a home remodel. But before hiring someone to turn your house into exactly what you want it to be, you should have a pretty good idea what that is. Start looking for inspiration while you are searching for the right contractor. Here are a few inspirational places to start looking for home remodel ideas.

The top home remodel magazines

Several magazines come to mind when I try to come up with some of the best home remodel journals. This Old House is one of the top resources for remodeling ideas and information. Not only will you find design and decorating inspiration here, but you will also learn some valuable information homeowners might use. Better Homes and Gardens is another good source of inspiration and information.

The top home remodel websites & blogs

Both This Old House and Better Homes and Gardens have websites that you can visit for home remodeling inspiration. Today, most magazines have websites or can be read online. Houzz.com is another website that has plentiful, up-to-date information and home improvement ideas.

Home improvement television shows

While home improvement television shows are not always realistic--you have to factor in the contractor's/architect's/designer's fees--they are a great place to start looking for design and style ideas. HGTV is where you will find home improvement shows running all day long. As you are watching, jot down any ideas you like or questions you might have for your hired professional regarding your own home.

Home shows or a "parade of homes"

If you want to visit one place to learn about all the local vendors, go to a home show. You will be able to see life-size displays, talk to vendors and bring home information to go over with your spouse. Another idea: find out if there is a Parade of Homes in your area, and when. This is a great way to look at recently-remodeled homes and see the work local contractors have done.

To order your copy of Remodeling Hell, CLICK HERE
For more information about Remodeling Hell, CLICK HERE
To order a copy of my new book Murder on Kilimanjaro, CLICK HERE
For more information about the Summit Murder Mystery series, CLICK HERE
Follow me on TWITTER
Friend me on FACEBOOK
Connect with me on LINKEDIN

Monday, January 21, 2013

Decorating tips to bust out of gray winter days

 A cozy scene can be created by using greenery and give your house a new look for the new year.
Fresh colors and a few new or repurposed accessories can go a long way toward perking up winter-weary rooms.

The days are gray and dreary, the holidays are history and those festive seasonal decorations that gave our interiors warmth and sparkle last month are now back in storage boxes.

It’s no wonder that we — and our homes — have the winter blahs.

So what to do?

You don’t have to undertake a major makeover to give your décor a big boost, according to interior designers. Fresh colors and a few new or repurposed accessories can go a long way toward perking up winter-weary rooms. What can you do for your home to give it the life and sparkle it had earlier?

Here are tips from designers on refreshing winter décor:

• Picture the possibilities
Take photos of the rooms you want to enhance, then study them to see what’s needed.

• Accessorize
Rooms are like outfits, according to Sutphen, and can be greatly enhanced by accessories. How many is a matter of personal taste, but in her view, homes tend to be under-accessorized most of the year. “Mantels are so nicely done during the holidays and so neglected the rest of the year,” she said.
“A few more important pieces are better than a lot of little tchotchkes,” cautioned Catherine Harrington, an interior designer with Waldenwood, an Eden Prairie, Minn., remodeling firm.

• Perk up pillows
New accent pillows can go a long way toward refreshing your interiors. “There are so many great fabrics, colors and price points,” Sutphen noted. Or make your own.

• Move things around
Harrington is a fan of creative rearranging. “Redecorating doesn’t have to be a lot of buying. It can be reusing things you already have,” she said, such as moving your living-room lamps to the bedroom and vice versa, or putting a small bedroom chest in the dining room. “All of a sudden it looks like a brand-new piece,” she said.

• Illuminate
“January is such a dark month,” Sutphen said. That’s why lighting — task, ambient and decorative — is extra-important during the winter.

“Proper lighting will bring a room to life,” she said. Try a new chandelier — they’re now popular in just about every room of the house, even over kitchen islands and bathtubs. “It can be a piece of jewelry for the home, and add a little bit of bling,” she said. “And adding a mirror to a room can do a ton to bounce around light.”

• Color therapy
“A fresh coat of paint makes everything fresh and new,” Harrington said. Try fresh spring or lime green on walls. “It’s very popular and has almost become a neutral,” she said.

• Rethink artwork
Try hanging a favorite piece of art in a new spot. Or group artwork in a new way, such as taking two prints with complementary colors or patterns and framing them as a pair.

• Add greenery
 It’s an inexpensive way to add height and interest.

• Add shine
To brighten up winter interiors, try an iridescent window treatment, a throw with some metallic threads or an antique book with some shiny gold on the spine.

• Invest in something new
Perhaps a patterned area rug. To find just the right size for your space, Sutphen advises spreading a bed sheet on the floor and folding it to different sizes. “That’s one of my favorite tricks.”

To order your copy of Remodeling Hell, CLICK HERE
For more information about Remodeling Hell, CLICK HERE
To order a copy of my new book Murder on Kilimanjaro, CLICK HERE
For more information about the Summit Murder Mystery series, CLICK HERE
Follow me on TWITTER
Friend me on FACEBOOK
Connect with me on LINKEDIN
 
 
*article source: seattletimes.com

Monday, January 14, 2013

Energy Saving Tips for Homeowners

According to the Environmental Protection Agency, homeowners can save 20 percent on heating and cooling costs by sealing and insulating their home. The typical home is said to have the same amount of air leaks as a home with a window open year round. Drafts can be eliminated by weatherizing the home.

“Preventing the unwanted circulation or infiltration of air not only improves the efficiency of a heating and cooling system, but also reduces humidity, dust and pollen; eliminates pests and noise; and even prevents the growth and spread of mold that may eventually compromise the structural integrity of a building. Bottom line, it’s an investment in your health and your home,” said Ruben Ornelas, owner of Beyond Construction & Remodeling.

Ruben shares the most common places to check for drafts and tips for weatherizing a home.

  •         Check the attic – weather-strip and insulate the attic access door.
  •         Seal around the outside of the chimney with metal flashing and a high-temperature sealant such as flue caulk.
  •         Seal around plumbing vents, both in the attic floor and in the roof. Check roof flashings, (where the plumbing vent pipes pass through the roof), for signs of water leakage while viewing the underside of the roof.
  •         Have a radiant barrier installed in the rafters or joists of the attic. This will reflect the radiant heat that strikes it.
  •         Incandescent fixtures should be upgraded to compact bulbs.
  •         Seal all other holes between the heated space and the attic.
  •         Replace any broken window glass.
  •         Re-putty loose window panes.
  •         Install new sash locks or adjust existing ones on double-hung and slider windows.
  •         Caulk on the inside around window and door trim.
  •         Weather-strip exterior doors, including those to garages and porches.
  •         Install foam-rubber gaskets behind electrical outlet and switch plates on exterior walls.
  •         Use paintable or colored caulk around bath and kitchen cabinets on exterior walls.
  •         Caulk any cracks where the floor meets exterior walls. Such cracks are often hidden cracks behind the edge of the carpet.
  •         Close the fireplace damper, when not in use. Make sure it closes tightly when a fire isn’t burning.

To order your copy of Remodeling Hell, CLICK HERE
For more information about Remodeling Hell, CLICK HERE
To order a copy of my new book Murder on Kilimanjaro, CLICK HERE
For more information about the Summit Murder Mystery series, CLICK HERE
Follow me on TWITTER
Friend me on FACEBOOK
Connect with me on LINKEDIN
   
Article Source:  virtual-saving.com and http://www.wenatcheeremodelingcontractor.com

Wednesday, December 12, 2012

10 Tips to Help You Focus on Home Projects


Tools


If you have a home, I guarantee that you have home improvement projects to do. Whether relating to season, maintenance, upgrades, or repairs, there is rarely a time when the list is empty. Some of us find the motivation to complete home projects easily, while others stop, start, re-start, or generally procrastinate. There are a variety of reasons why you might have trouble following through on projects. Not surprisingly, many of them are emotionally based. Sometimes you have to do some inner work before there is a prayer the outer work will actually be completed. Here are a few tips, both psychological and practical, to help you focus and follow through on projects.


1. Look at why you are doing the project to begin with.
“There is a conflict inherent in what we want and what we think is OK,” said Kevin Blanchard, MSW, who practices in Greenfield, MA. Blanchard said that people can have many reasons for wanting to do a project, one of which is to give others a certain impression of you or you feel you must to make your partner or others happy. “Some people want to be seen as someone who has freshly painted walls. Or is it your wife or mother’s idea? You have to ask yourself what you really want to do,” said Blanchard.

2. Prioritize.
“Thinking on paper and on a calendar is helpful when you have a list of projects,” said Marek Tresnack, LMHC, who also has a practice in Greenfield, MA. “Set up a plan for a month, a week, and a day,” he said.

Another idea in terms of prioritizing would be to make your list based on whether it’s a critical safety issue, routine, has a specific time-line, such as creating a room for a new baby, or would simply improve the value or look of your home.

3. Be realistic regarding your skill-set.
I don’t think I’m alone in the notion that in order to save money, I have to do just about every project in the house myself. Yes, I’ve even managed a lot with the help of detailed books on repairs, but there is a point where you simply need to hire a professional, especially for code-heavy or dangerous work like electrical work. You will save time, money, and a great deal of stress. A colleague of mine who lives in New York City hired a plumber recently to do some work that she just couldn't do herself after wasting hours trying to DIY the job. It was worth it; she's no longer showering in ankle-deep water.

4. Pace yourself, multi-tasking doesn’t always get more done faster.
Tresnack said that when beginning a project to try to  not create too many smaller tasks.  “Even the most multi-tasking CEO’s focus on one thing at a time, following through without letting anything disrupt them,” he said. Tresnack said that the mind compartmentalizes each task and each time we fully complete a task, a part of our mind can relax. “When you have accomplished something the mind can breathe, rest, and let go of it. It’s like having too many Windows open on your computer, your mind gets slower and slower,” he said.

5. Become “prevention focused.”
“Prevention focus is a term psychologists use to describe what happens when you think about your goals in terms of what you might lose,” said Dr. Heidi Grant Halvorson in her blog “Peeling back the Onion.”

“Study after study shows that when people think about their goals in terms of what would happen if things go wrong, they procrastinate less,” said Halvorson.

6. Have attainable goals.
Similar to prioritizing, assessing your resources carefully, including your time, and prior to starting a project, will help flesh out what’s realistic. I’ve learned that when I lay out what’s really needed in terms of materials, time, and cost, I’m able to then have a clearer vision of the project, which tends to reduce what I think of as the “looming” aspect of the project and it becomes easier to move forward. Having attainable goals also helps me budget my time, another resistance-reducer.


7. Try to avoid perfectionism.
Perfectionism can lead to the noblest cause of procrastination. When I have created an image of not only what, but how much needs to be done, I’ve sometimes become too overwhelmed to actually do the project. Case in point, I had a room that had wallpaper I hated. In peeling off the wallpaper, the backing was left behind. In a 100-year-old house with plaster walls, getting the backing off and the room skim-coated and painted ended up taking nearly three years. In wanting it perfect right away, I just couldn’t get started.


8. Let go of the fear.
For those of you who are inclined towards introspection, Tresnack recommends sitting down before you start a project and try to focus on what about the project may be making you afraid. “If you are procrastinating, sit for a moment and look at what your fears are about the situation. You may even want to write about it,” he said. Tresnack said that procrastination creates an “emotional cloud, which makes things harder to accomplish.”

9. Celebrate your successes.
“Every time we accomplish something it gives our mind a little boost,” said Tresnack. It’s important to stop and relish what we have accomplished before moving on to the next project. If you feel more satisfaction, the next project may feel more enjoyable.

10. Make projects into social events.
There are always a lot of small projects that need to be done. But for the bigger projects, make it an excuse for a party or a date with your significant other. Having a work a party is not a new idea, but it’s a fun one. Not only can you get the project done faster, but you can build on the feeling of making work seem less like work.


To order your copy of Remodeling Hell, CLICK HERE
For more information about Remodeling Hell, CLICK HERE
To order a copy of my new book Murder on Kilimanjaro, CLICK HERE
For more information about the Summit Murder Mystery series, CLICK HERE
Follow me on TWITTER
Friend me on FACEBOOK
Connect with me on LINKEDIN
Subscribe to my YOUTUBE channe

Tuesday, December 11, 2012

Eight Tips for a Supremely Organized Winter Garage


Houzz_FlowWall_eclectic-garage-and-shed.jpg

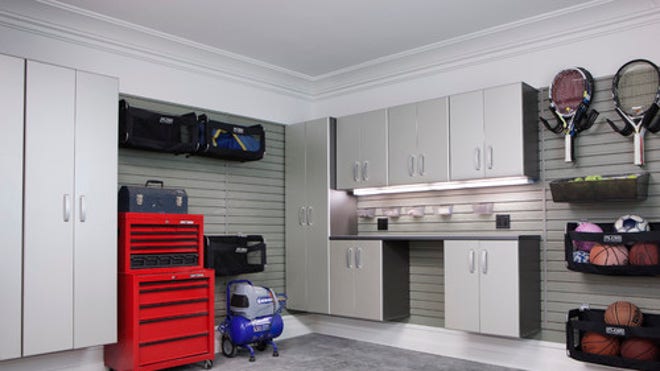
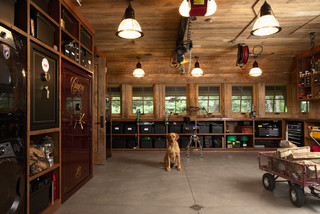
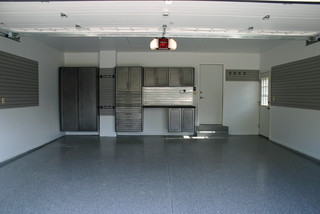
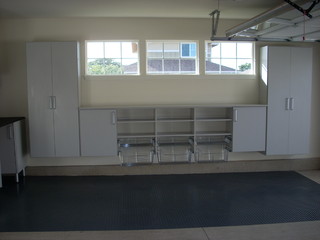
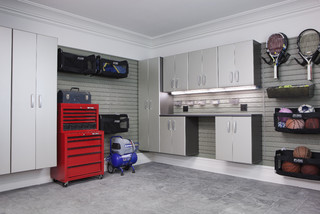
Mountains of snow on the horizon mean that shovels, snow blowers, skis and more are about to come out of the woodwork. Prepare appropriately for the daily use of winter equipment and gear by getting your garage in tip-top shape now. An organized garage that acts as a functional storage space will keep everything you need at hand, allowing you to move through chores and errands with efficiency and ease. Optimize your garage space by following the below tips from the pros.

Plan accordingly. Before you make any move, assess your space carefully. Even if you want to do the dirty work yourself, you may want to call in a professional simply to help you create a working vision. “You want to understand exactly what your personal storage requirements are, and then design your garage accordingly to fit your needs,” says Jeff Murphy, president of Murphy and Co. Design “It’s amazing what a good design can do to the quality of life in your garage.”


Avoid general floor storage. First rule of thumb: Keep the garage floor as clear as possible. “Snow melting off your car will make anything left out wet and muddy,” says Rozalia Kiss, design manager at transForm


Work your walls. Use all the wall space available; this not only keeps things off the floor, but also leaves optimal space for your car. “Consider a wall track system to hang shovels and other tools in an easy-to-reach place by the garage door,” says Kiss. “For heavy, bulky items such as winter sports equipment, install deep garage shelving with metal stiffeners.”


Look up for general storage. Running out of available wall space? Use the ceiling. “There are many great companies that specialize in simple garage storage, including overhead storage that can mount on your current ceiling,” Murphy says.


Consider creating a gear closet. Murphy suggests creating a dedicated sports or gear closet out of a room accessed directly from the garage. “These spaces are simply a larger closet with shelves and open storage, which works great for unloading kids’ sports items right from a vehicle into a room where it doesn’t matter if it becomes wet or dirty,” he says. “This room is typically heated the same as the house.”


Hang racks for skis and snowboards. “Mounting a ski or snowboard rack on the wall is a nice way to keep the clutter down in the garage,” says Murphy. “It allows for a dedicated location to keep them off the floor and out of the way of tipping over.”


Keep sand and salt at hand. Use sliding wire baskets or install a tilt-out hamper for easy access to sand, salt and even (well-wrapped) birdseed. “This also helps to keep them protected, stored and off the floor all winter long,” says Kiss.


Install motion-sensor-activated and battery-powered LED lights. You never know when a winter storm might challenge your power, so it’s best to be prepared. “Motion-sense-activated and battery-powered LED lights help you find supplies in the event of a power outage and can be easily mounted under cabinets to illuminate countertops, and installed in drawers and closets,” says Kiss

Article source: http://www.foxnews.com/leisure/2012/11/27/8-tips-for-supremely-organized-winter-garage/ 

To order your copy of Remodeling Hell, CLICK HERE
For more information about Remodeling Hell, CLICK HERE
To order a copy of my new book Murder on Kilimanjaro, CLICK HERE
For more information about the Summit Murder Mystery series, CLICK HERE
Follow me on TWITTER
Friend me on FACEBOOK
Connect with me on LINKEDIN
Subscribe to my YOUTUBE channel