Tuesday, December 23, 2014

Tackle Tough DIY Tasks Like a Pro


(BPT) - Have you been putting off some seemingly hard-to-handle home improvement projects? If so, there’s still time to tackle do-it-yourself tasks like a pro – from painting high ceilings and stairwells to repairing garage and basement floors. With the right tips and tools, you can accomplish these home improvements in a snap.

Reach new heights
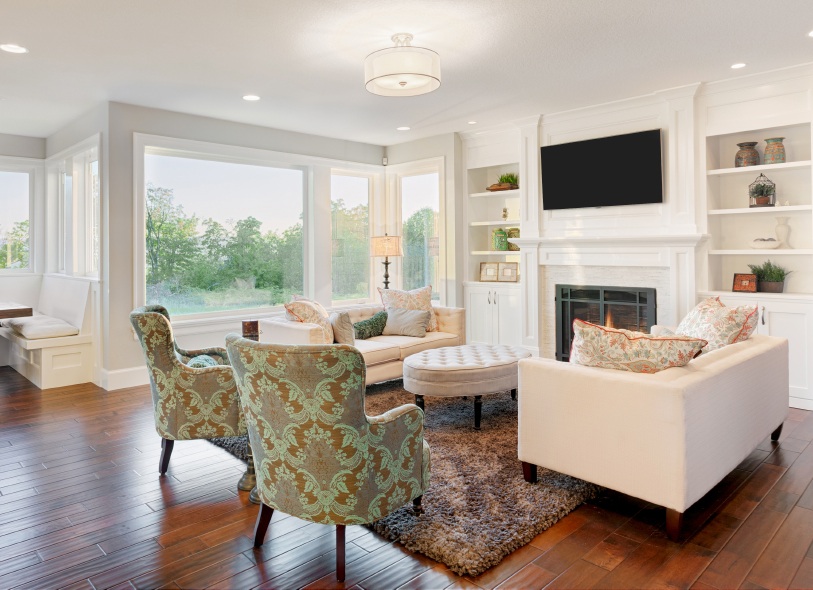
When it comes to sprucing up foyers and great rooms, painting may appear to be a challenge for most homeowners – especially when it comes to the ceiling. But it doesn’t have to be. Start by covering furniture and floors with drop cloths or plastic sheeting, or removing furniture from the room entirely.
Start the painting process from the top. A fresh coat of paint on a ceiling can transform a room. Grab a ladder and be mindful of necessary safety precautions. Before painting, shield your eyes by wearing protective goggles. Lightly sand your ceiling and remove any dust with a damp rag or sponge. Then, edge around your ceiling with a paint brush to line the perimeter of the ceiling.

Looking for an easier way to paint the main portion of the ceiling? Select a lightweight and durable extension pole such as the new Purdy Power Lock extension pole, which eliminates pole-to-frame wobbling. The Power Lock pole features a universal tip that connects to nearly all roller frames and rollers, including Purdy Marathon rollers.

Start painting in one corner of the ceiling and form a “V,” then roll the paint out and around. Work in 4-foot sections and always roll into the wet edge of the section you were previously painting. Wait for the ceiling to dry completely and apply another coat.

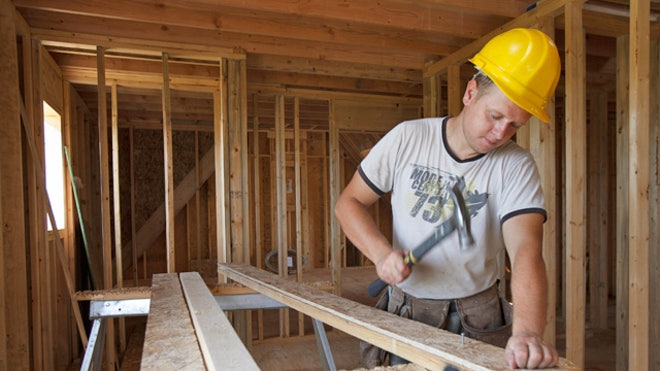
Safely painting stairwells
Many two-story foyers are accompanied by stairwells with equally tall walls. These high-traffic areas are very visible, yet may be the last place homeowners care to spend time updating. While most areas of the home can be painted with a roller or brush and a basic stepstool, stairwells may pose a safety risk. There are few ways to carefully cross this potentially tricky task off of your to-do list.  

A sturdy extension pole that allows for smooth length adjustments is a must. Power Lock extension poles enable the user to safely and effectively paint areas in and out of reach. You can also utilize an extension ladder on the side walls of a stairwell with a ladder leveler. Simply place one leg of the ladder on one step and the other leg, with the ladder leveler attached, on the step below it. Adjust the ladder leveler so that your ladder is resting evenly, and you’re ready to update the walls and ceiling in this space.

If you find yourself in a spot where the results are less than ideal or the job is simply too complex, don’t be afraid to reach out to a professional for assistance.

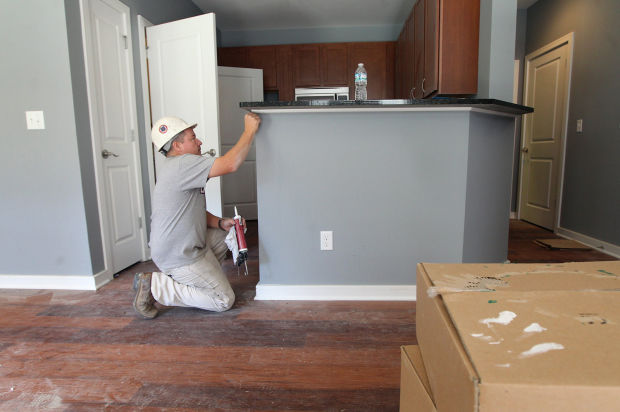
Repainting basement and garage floors
Has repairing and/or repainting the floor of your garage or basement made your to-do list for years but never seems to be your No. 1 priority? Make this year the one where this project gets done. First, pick up protective eyewear and gloves for the job as it will involve paints and cleaners, and be sure the area is well ventilated. Before beginning, it is best to remove stains by using a three-parts water to one-part bleach mixture. For tougher stains, consider using a pressure washer. Be sure to thoroughly rinse the area. Once the floor is clean and dry, repair any cracks in the concrete using concrete/mortar-repair compound for smaller cracks or concrete patch for larger ones.

Next, you will want to apply a thin primer coat using a paint roller attached to an extension pole like the Purdy Power Lock to ensure you don’t paint yourself into a corner. After eight hours, start with a coat of the floor paint and allow the first coat to dry for one full day before applying the second. Wait about 24 hours before walking or driving on the newly painted surface.

By following these helpful tips and using the proper tools, you can complete lingering projects in no time. You'll then be able to enjoy great looking, long-lasting results.

To order your copy of Remodeling Hell, CLICK HERE
For more information about Remodeling Hell, CLICK HERE
For more information about the Summit Murder Mystery series, CLICK HERE
Follow me on TWITTER
Friend me on FACEBOOK
Follow me on PINTEREST

Friday, December 19, 2014

The Gift of Stylish Decor


The month of December is a whirl of activities that all center around home and family and for many that means opening doors to guests. And while the idea of sharing space with family and friends conjures up feelings of warmth and sentiment it can also bring out the insecurities of incomplete projects and outdated décor.

Clearly there is no time to renovate or undertake a major decorating task but there are a few DIY projects that you can pull off in a short time. Adding a pop of colour with paint will do wonders to dress up space and create an updated feeling within your home.

First it’s important to consider the existing colour scheme so that the new blends in with the old and doesn’t look out of place. The idea is not to create a whole new look but to help enhance the current décor. Next consider what trends are coming for 2015 and how you plan on implementing them. Is there a colour you have had your eye on? Tones are going to be more muted in the next year; there is an earthy influence with undertones of brown showing up in paint colours.

A starting point would be to take a version of your existing accent colour and tone it down a shade or two. Vibrant blues and greens have had strong influence on the décor scene. A simple decorating project would be to paint your powder room in a muted tone of the electric blue that has been so prevalent for the past few years or for even more “wow” add a trending shade like pantone’s colour of the year, “marsala red”.

Now, until December 20th, CIL Paint is offering up tester sizes for $3.97 at The Home Depot stores, so budgets won’t feel stretched by a simple, yet stylish DIY painting project. CIL paints “Deep Garnet” is the perfect version of the new on trend colour.

Looking to dive in a little deeper with an update that will create big impact? Tackle an accent wall in the guest room. The guest room is definitely an underused space and often gets overlooked when it comes to adding style and then panic sets in as guests are making their way for a holiday visit! Little touches go a long way to making visitors feel welcome. Fresh flowers and magazines on the bedside table, a cozy robe hanging on the door tells your guests you’re happy to have them. Go the extra mile and add some pizazz to the space and paint one wall in a calming soothing tone that says the room has style, all the while being a restful sanctuary!

The accent wall is typically the first wall you see when you walk into a room, but this rule can bend for bedroom décor and the wall where the bed rests is a perfect place for a pop of colour. CIL testers are just the right amount of paint for this minor project. Try CIL’s “Lakefront” for a soothing pop of colour.

There is still time to bring your space up-to-date. Plan for a half-day DIY project, crank the Christmas music and get to work. The new look will be appreciated long after the tree has been put to the curb and guests have made their way back home, consider it a gift to you this holiday season!

To order your copy of Remodeling Hell, CLICK HERE
For more information about Remodeling Hell, CLICK HERE
For more information about the Summit Murder Mystery series, CLICK HERE
Follow me on TWITTER
Friend me on FACEBOOK
Follow me on PINTEREST

Monday, December 15, 2014

Lowe's Uses Vine and Instagram to Showcase DIY


In addition to a new set of Vine videos, the home improvement chain is using Instagram videos as trailers for its DIY projects that are popular posts on its Pinterest page.

Lowe’s has launched a video marketing campaign, using social media to teach consumers how to do home improvement projects.

With BBDO New York, Lowe’s used Vine to showcase the projects – a shelf made of pipes, a backyard fire pit, and a tile backsplash for the kitchen – from start to finish, with detailed how-to steps. With two taps at a time, users can pause on each frame, lingering on each instruction for as long as they need.

The campaign also uses Instagram, whereby videos are made with the Hyperlapse app that allows users to make time-lapse videos. These serve more as trailers for some of the home improvement brand’s more popular Pinterest projects, such as under-bed drawers, a lattice picture display, and the aforementioned pipe shelf.

Using video, the goal is to inspire people in a way that a static image couldn't by showing them the project from start to end, says Bob Estrada, senior vice president at BBDO New York.

"I think when you see [the project] in six seconds, you see that it's achievable and it demystifies it a bit," Estrada says. "Seeing someone else enjoying the final version of the project in their home may bring people closer to action and spur someone to do the project themselves."

Estrada thinks social media is a fun way to engage consumers - Lowe's is extremely popular on Pinterest, with nearly 3.5 million followers - but for Kate Ryan, vice president of integrated communications firm Diffusion, using these video platforms is also a smart way to engage the coveted Millennial demographic, in particular.

"Lowe's use of Vine and Instagram is a smart move in reaching today's younger consumers with notoriously small attention spans," Ryan says. "Millennials love bite-sized content, but to truly engage them long-term, marketers need to take them seriously and develop content that's authentic to the way they live their lives."

To order your copy of Remodeling Hell, CLICK HERE
For more information about Remodeling Hell, CLICK HERE
For more information about the Summit Murder Mystery series, CLICK HERE
Follow me on TWITTER
Friend me on FACEBOOK
Follow me on PINTEREST

Wednesday, November 26, 2014

8 Tools to Help You Manage Projects at Work and at Home


Postit
Post-its. Whiteboards. Hand-written to-do lists.

Keeping projects organized, whether at home or in the office, used to require a whole lot of ink. In today's world of digital, however, staying on top of your work is more "swipe" and less "write." A constantly regenerating crop of apps and programs has emerged to help keep you organized.

Below is a list of eight project management hacks, both for the home and for the workplace; absolutely no BICs or Uniballs required.

Workplace

SAMSUNG DIGITAL CAMERA
Image: Flickr, Cory M Grenier
  • Podio: Whether you're a freelancer, small business owner or corporate manager, Podio lets you view all of your tasks in one place. The software, which runs on desktop, mobile and tablet, allows users to create workspaces where they can mark off completed tasks, assign projects, share files and even auto-generate comments.Additionally, Podio handles CRM, sales leads and recruiting — saving small businesses time and precious seed money. Wish Podio could do more? The software has a drag-and-drop development tool that even non-programmers can master.
  • Asana: Asana is a technological godsend for those who dread rummaging through a cluttered inbox. The app eliminates excessive back-and-forth emails, allowing team members and managers to create project cards, update assignments on-the-fly and communicate inside the program — without sending superfluous emails and IMs for "status updates."
    Asana works especially well for companies with loose structures and minimal red tape
    Asana works especially well for companies with loose structures and minimal red tape; users are able to freely establish sub-projects within larger assignments, and post updates without altering the card or getting manager approval. Users can also structure Asana tasks by date, or make them dependent upon the completion of other assignments.
  • Planet Soho: Planet Soho aims to be a Jack-of-all-Trades tool for small business owners and freelancers, though its core competency lies in accounting and invoicing. To make sure that small enterprises don't dedicate outside resources to filing and sending, Planet Soho can draft and auto-send online invoices. The company will also send paper invoices for you if that's the method you prefer. Planet Soho's software also features project management, inventory control, CRM and email and calendar functions. For managers, Planet Soho features budget-setting and task-assignment functions, like other popular task management tools.
  • Flow: If you feel overwhelmed by multi-faceted task-management programs that seemingly let you do anything under the sun and prefer a simple interface, check out Flow. The software allows managers to assign, organize and prioritize tasks while also controlling who can see what. That means managers can give outside contractors access to a team's Flow while also controlling what they can see. For a more hands-off experience, Flow is able to send notifications of upcoming tasks and set repeating tasks.

Home

tools
Image: Flickr, Flattop341
  • HomeRoutines: Homemakers know all too well that the best laid plans most often go awry. A manageable to-do list? Sounds nice in theory, but when mini-crises loom around every bend (especially when you have a toddler), a parent can easily lose track of what needs to be done, parlaying a half-complete to-do list into an insurmountable task sheet.
    HomeRoutines, a mobile app, helps you stay on task without having to make dozens of notes
    HomeRoutines, a mobile app, helps you stay on task without having to make dozens of notes that could get lost. The app lets users set daily and weekly checklists that can be repeated, so if they want to clean the bathroom and closets again in two weeks, HomeRoutines will present them with the same to-do list when the time comes. Users can select a daily focus (e.g., restock fridge) or plan ahead, like assigning a different cleaning zone for each week of a month.
  • Houzz: Have a home improvement to-do list? Normally, you'd have to jump around to multiple sites and professional recommendation services like Angie's List. Houzz, on the other hand, is a one-stop-shop for home and office design ideas — it houses thousands of articles and photographs that could be the inspiration for your next professional or DIY project — and the professionals who can pull off the job. If you see a bathroom design that you like, for example, Houzz can help you find and vet a nearby remodeling specialist.
  • Lift: Don't confuse Lyft, a ride-sharing service doing battle with Uber, with Lift, a mobile and desktop app that lets users set, track and complete goals. It doesn't matter whether your goal (a.k.a. the "lift") is small — let's say taking more vitamins — or large, like running a marathon or decluttering your entire home;
    Lift is there to record your progress and keep you on track with "momentum" graphs and "check-ins"
    Lift is there to record your progress and keep you on track with "momentum" graphs and "check-ins" to celebrate your perseverance.The most powerful and unique part of Lift is its community aspect. The app allows you to connect with its entire community to cheer each other on. Try inviting a few friends or colleagues onto Lift to create a more personal enclave of reinforcement within the larger community.
  • Snapguide: Are there a few home improvement or beautification projects you'd like to undertake, but worry you don't have the wherewithal or financial resources to complete? Snapguide is a handy mobile and desktop DIY guide to a smattering of projects that you probably thought were impossible without professional help. Snapguide users are encouraged to carouse the site for tips and how-tos, and even create their own content with photos and videos of their projects.


    To order your copy of Remodeling Hell, CLICK HERE
    For more information about Remodeling Hell, CLICK HERE
    For more information about the Summit Murder Mystery series, CLICK HERE
    Follow me on TWITTER
    Friend me on FACEBOOK
    Follow me on PINTEREST

Tuesday, November 18, 2014

Five Remodeling Ideas for Your Living Room

HOME PATIO 
 
A living room is the hub of a home, and host to celebrations, family gatherings and movie marathons. According to the Remodeling 2014 Cost vs. Value report, a midrange family room addition costs $80,765 and you can recoup 68.8% of the cost during resale. Use these tips as inspiration to create a more functional living room, while adding value to your home.

2014-11-19-stagingmistakes.jpg

Incorporate a home office area

Designate an area for a multipurpose office space that everyone in the family can use. If your desk space and family computer are in plain sight, they are likely to get more use than when located in a separate home office.

Extend your space outdoors

Add a multi-season sunroom directly off your living room to enjoy year-round. Work closely with your builder to mimic your home's original style and structure so the new addition feels like a seamless extension of your house. The additional square footage will also add to your home's value.

Update your windows

Replacing windows can be expensive, but installing energy-efficient windows will cut down on your current energy bills over the course of time. If you have active kids or live in an area prone to severe weather, consider impact-resistant windows. These will help protect against damage to the house and could reduce home insurance premiums.

Add customized storage

Finding a discreet place for media systems, personal items and extra storage can be difficult. Custom built-ins will showcase your belongings and keep your main living space organized. Add recessed lighting inside the shelves for a streamlined way to highlight your favorite personal items and books.

Manage your home technology from a mobile device

Install a budget-friendly speaker system that you can control from your mobile device. You can also manage lighting, heating and cooling systems and surround sound on any mobile device using home automation technology.


To order your copy of Remodeling Hell, CLICK HERE
For more information about Remodeling Hell, CLICK HERE
For more information about the Summit Murder Mystery series, CLICK HERE
Follow me on TWITTER
Friend me on FACEBOOK
Follow me on PINTEREST

Thursday, October 23, 2014

Renovation Solutions: Tips for energy efficient homes in winter


It is that time of year again: time to start heating the house. Many of us hold out as long as possible, but the old “put on a sweater” or “grab a blanket” routine will only last a few more weeks at most! Our lovely fall weather can’t last forever.

Many people, especially homeowners living in older homes with outdated heating systems or poor insulation, find there is something to be desired when the heat kicks on.

Inefficient heating systems struggle on two levels. First, they don’t do a very good job keeping the house steadily warm and second, they cost more to run. A forced-air furnace or a boiler can be replaced without remodeling your home. However, during a major remodeling project, the mechanical equipment can be relocated as well as replaced, and the ductwork can also be reconfigured to add more ceiling height to some areas.

If you are adding square footage during a remodel, this will change the requirements of the heating system. Heating systems are designed based on the size of the house. A loose rule of thumb is that one forced-air furnace generally handles about 2,000 square feet. If you are expanding beyond that, a second unit may be required.

One of the most important parts of the heating system in a house actually has nothing to do with the mechanical heating unit. It's the insulation found in the home.

In a new home, insulation is added in the walls, attic/roof, under concrete slabs and in crawl spaces. Older homes were built with far less (or no) thought as to how to insulate these areas, so part of every remodeling project should be to update the overall energy efficiency of your home as much as possible.

Insulation is rated in R-values. R-value is the measurement that tells you how well your insulation will resist heat flow or heat transfer. The higher the R-value, the better the efficiency. The government’s energy conservation recommendations for R-values depends on climate and varies by ZIP code.

For most of Utah, the ceiling is recommended to have an R-value of 38, the mass wall R-value should be 19 and the floor R-value should be 30. Washington County, with its warmer climate, requires less insulation, with a required ceiling R-value of 30, mass wall R-value of 8 and floor R-value of 19. Up north in the Cache County, the numbers are slightly higher to combat the colder winters, with the recommended ceiling R-value of 49, mass wall R-value of 19 and floor R-value of 30.

Adding insulation to an existing house can be a do-it-yourself project for the ambitious homeowner or you can hire a professional insulation contractor. Either way, the first step is determining the extent of the existing insulation — not an easy proposition. If you have a brick home built before about 1950, there is essentially no insulation in your walls. Houses from the 1950s and '60s have minimal insulation. In the 1970s, efficiency became more important, though the technology of insulation has obviously improved over the last 40-some years.

Adding insulation to the older masonry home has to be done by adding rigid insulation to the exterior and resurfacing the house with another exterior material, such as stucco or cement fiber board; on the interior, you essentially need to build an new stud wall, add insulation and add new gypsum board (sheet rock).

For a wood-frame house, blowing insulation into an existing stud wall can be done by cutting small holes in between each stud. If you go to the extent of removing the interior sheet rock to add more or new insulation, the well-known pink fiberglass blankets are still available, but other options are being used more now — blown-in cellulose and sprayed-on foam are two of the most common.
While each type of insulation has its own pros and cons, the quality of the installation of the material is critical in the overall efficiency of the project.

Adding weather stripping around doors and windows is another way to keep heat from escaping during the winter. Just make sure as you make your home more air-tight and more energy efficient that you always address indoor air quality, too. Less air exchanges (of indoor air for fresh outdoor air) means a more efficient house, but may it may also risk compromising indoor air quality. You may need to add a unit called a heat recovery ventilator to pull more fresh air into your home as the exterior envelope gets tighter.

Older, inefficient windows are not much more than holes in your outside walls. Even the best windows have a much lower R-value than the surrounding walls, but double-paned insulated units which are properly installed and flashed will make a significant impact on your energy bill.
You have several window choices in terms of materials for the window frames, namely wood, vinyl or fiberglass. In addition to being maintenance free, there are many styles of windows from which to choose; these should obviously be coordinated with the style of your home.

Part of the charm of older homes is often found in their windows. For instance, many homes built in the first part of the 20th century have windows made of wood and leaded glass. These are high maintenance units that could hardly be less energy efficient, but they surely look terrific. One of our clients with fabulous original windows went to great lengths to preserve the look of the front of the house. With the help of a local company, the client actually sandwiched her existing leaded windows into a new window unit which preserved the look and updated the efficiency of the windows. This is a much better-looking and more efficient option than the outdated approach of adding storm windows when winter approaches.

Taking advantage of some or all of these updates will make winter more comfortable this year and your energy bill more affordable. Once you know the cost of one or more of these updates and the potential monthly energy savings, you can calculate a return-on-investment schedule to know when your break-even point will be. You can contribute to the health of the planet and make the approach of winter a much more pleasant thought by upgrading the energy efficiency of your home.

To order your copy of Remodeling Hell, CLICK HERE
For more information about Remodeling Hell, CLICK HERE
For more information about the Summit Murder Mystery series, CLICK HERE
Follow me on TWITTER
Friend me on FACEBOOK
Follow me on PINTEREST

Wednesday, October 22, 2014

William Shatner does Home Renovation

William Shatner stars in home-renovation show, how to use wood pallets safely and do you need replacement windows? 


shatner.jpgWilliam Shatner and his wife Elizabeth star in the DIY Network's newest celebrity home renovation series, "The Shatner Project."  
 
SHATNER RENOVATES HOME: Pop culture icon William Shatner is the star of the DIY Network's newest celebrity home renovation series, "The Shatner Project." The series, which

premieres on Thursday, Oct. 23, shows how Shatner copes as project manager of his own home remodeling.

Shatner and his wife Elizabeth renovate their 1970s-style California home, including turning the front patio area into the perfect place for big family parties, and remodeling the media room.

If you've used wood pallets for DIY projects, what are your best tips? Share in the comments.
The premiere episode features the Shatners, with the help of a designer and a construction crew, swinging sledgehammers to help demolish old cabinets, countertops and tile in their kitchen.
"The Shatner Project" premieres at 10 p.m.

USING WOOD PALLETS SAFELY:  Using wood pallets for DIY projects is popular right now because woodworkers like the rustic look of pallets, and usually they can be obtained for free. But there are risks, says Elmer's Glue, which makes wood glues.

Many pallets are treated with toxic chemicals, such as pesticides and fungicides. Pallets that were used to transport vegetables may carry germs; pallets that were stored outdoors could be infested with mold or insects. Here are some tips for using pallets safely from Elmer's, which makes wood glues:
 Determine if the pallet was chemically treated. Pallets that are used domestically are generally heat-treated or kiln dried and are the safest to use. Most international pallets are treated with chemicals. Do not use pallets stamped with MG for any projects or as firewood. Avoid colored pallets; they are frequently used to carry chemicals.

 If it looks as if chemicals leaked or spilled onto a pallet, choose another one. Don't use pallets stored outdoors for indoor décor items.

 Prep your pallet by scrubbing it with bleach and warm water outdoors. Allow it to dry completely.
Always wear gloves, dust masks and safety glasses while sanding pallet wood. Never use repurposed pallet wood in projects involving food, children's toys or children's furniture.

If you're not sure if a recycled pallet is safe to use, research local companies or Internet sources that sell new ones.

To order your copy of Remodeling Hell, CLICK HERE
For more information about Remodeling Hell, CLICK HERE
For more information about the Summit Murder Mystery series, CLICK HERE
Follow me on TWITTER
Friend me on FACEBOOK
Follow me on PINTEREST

Friday, October 17, 2014

Jennie Garth's Four Easy Tips to Decorate Your Home

PHOTO: Jennie Garth attends Watch What Happens Live, June 28, 2014.
Actress Jennie Garth is best known for having starred in the iconic “Beverly Hills, 902010,” but now she’s taking on home improvement. 

In “The Jennie Garth Project,” a series on HGTV, viewers follow along as the 42-year-old actress purchases a dated Hollywood Hills home and renovates it for herself and her three children.

 Garth appeared on “Good Morning America” on Thursday to share the knowledge she’s gained while remodeling her home. 

Here are some of her suggestions for sprucing up a home: 

Jennie’s Tips
1. Barn Doors. Interior barn doors add privacy without taking up floor space. They’re easy to install and can be done in just one weekend. You can use recycled or new doors to suit your budget, and you can choose traditional, rustic or contemporary hardware finishes to complement your style. You can chose either a single door that slides from one side to the other; a bi-parting door, consisting of two doors that meet in the middle; or a bypassing door, in which two doors are mounted inside a frame and slide one behind the other. 

2. DIY Medicine Cabinet. Medicine cabinets are a great way to solve storage situations in the bathroom, and they are easily installed, simple do-it-yourself projects. Choose a medicine cabinet that stands out in the same way that a piece of art does – especially if you consider adding a fun graphic pattern to the cabinet. Adding wallpaper inside a medicine cabinet also adds character and style. Check flea markets and garage sales for old medicine cabinets and spruce them up, then install them to enhance your space with vintage charm. You can also buy new medicine cabinets at a local home improvement or bath and bed specialty stores. 

3. Tile, tile, tile. Adding a glass tile backsplash to your bathroom is easier than you think, and it provides a way to bring contemporary class to any bathroom remodeling project. Consider using a laser level to save time on large tile projects, and, to personalize your project, add a tile border to complete the look. You can also revamp your existing tiles with tile paint and a grout pen. 

4. Custom Artwork. Create meaningful artwork that reflects your personality and life, and make sure to get your family involved so they can put their stamp on the space as well. Creating your own artwork is much cheaper than purchasing works from a gallery. Another idea is to get out some of your children’s old artwork, copy and enlarge it, and then frame it or decoupage it onto a canvas and display it in your home. 

To order your copy of Remodeling Hell, CLICK HERE
For more information about Remodeling Hell, CLICK HERE
For more information about the Summit Murder Mystery series, CLICK HERE
Follow me on TWITTER
Friend me on FACEBOOK
Follow me on PINTEREST

Wednesday, October 8, 2014

Survive A Kitchen Remodel

15 tips on surviving a kitchen renovation


A kitchen remodel can be one of the most rewarding home improvement projects and also the most frustrating to endure.

Tearing out the heart of your home requires a plan for how to survive the weeks to months of construction ahead.

If your project is a basic tear out, plan on four to six weeks without much access to the kitchen, but if you're doing a significant renovation, expect at least three months of disorder.

Beyond the decision-making and budget-making are things many people don't prepare for: The overwhelming number of decisions required and eventual decision fatigue, hitting the wall on prepackaged or carryout meals and the emotional upheaval that comes with having the central part of your home upended for weeks.

You need a plan of how you will deal with the life details as well as choosing countertops, paint, cabinets, flooring, tile and so forth.

Here are best tips on how to survive.
1. Set up a separate, temporary kitchen.
If at all possible, move your current refrigerator to another room in the house, where you can still access it. Otherwise, get a small college fridge to keep the essentials. A spare microwave is also a critical appliance.
Be creative with small plug-in appliances such as a coffee maker or an electric skillet, which can be used to make anything from pancakes to Hamburger Helper on it, said Kim Feld, a kitchen designer with National Kitchen & Bath.
Consider getting a two-burner hot plate.
If most of your trash and recycling was collected in the kitchen, move temporary garbage cans to a place you can tolerate them. And be prepared to take out the trash more frequently.
2. Find a place in your home to eat.
Consider the family room, where you can set up the fridge and microwave.
3. Realize you'll have to wash dishes in the bathroom.
Try to keep a sink hooked up on your main level during construction.
4. Add the cost of eating out into the renovation budget.
Figure out how much your family typically spends on a meal eaten outside the house. Multiply this by the number of meals in a day and weeks the project may last. It's best to have a rotation in mind of reliable carryout and prepackaged microwavable meals.
5. Prepare for noise and dust.
"It is messy. It is disruptive, and it can get expensive. There is no way around that," Feld said.
Jon Kay, a manager at Signature Kitchen & Bath, said to expect day-to-day interruption. "Plan on there being a mess every day."
6. Consider your pets.
If you can ask a friend to take them, or have them kenneled, that might be best. If not, give them extra attention, as the off-limits room and noise will disturb them, too.
7. Get a sketch or design plans beforehand.
"Think about how the kitchen is going to work from a function level," Kathy Israel, owner of Accents on Cabinets, said. Also, think about where all your current kitchen items and appliances will fit into the new kitchen.
It's best to include a professional in this sketching stage so they can let you know potential pitfalls.
8. Also consider hiring a designer.
Designers can be hired by the hour to help guide choices. This can save money and regret down the line.
9. Hire a general contractor carefully.
A good relationship with the general contractor is crucial, Mike Beck at Beck/Allen Cabinetry, said.
This will be the point person you are spending the most time with, so find out about how often he plans to communicate with you. Will he text or email photos if you are out of town? How quickly will he return phone calls? The worst kitchen nightmares are those that involve a contractor who disappears or won't return calls.
In remodeling, there are probably 50 things that can go wrong, and if you have a good contractor, you may only know about two or three of them.
10. Be prepared for days when you don't see any progress.
Every decision in a construction project involves a timeline. So, there will be days of waiting — waiting for the countertops to be measured or waiting for the backsplash to arrive.
11. Order as much as possible before the job starts.
Don't start a project until all the decisions are finalized. As projects wear on, people tend to be stressed and don't have time to pick out details such as hardware quickly, which can slow down the entire project.
12. Expect some delays and cost overruns.
When you get the estimates, it's wise to add 20 percent to that number and ask yourself if you could still live with that number. If you don't have that cushion, think twice about proceeding.
13. Don't sweat the small stuff.
"Trust the people you've hired," said Jenny Rausch, president of Karr Bick Kitchen & Bath. Ask their opinions. Don't second-guess yourself. Don't agonize over the smallest details like hardware and countertop edges.
Keep a sense of perspective. Homeowners can get hyperfocused and paralyzed by decisions on the smallest details. Can you really remember what the hardware and edges in your friends' kitchens look like?
14. Get out of the house altogether.
If you can afford it, renting a short-term, furnished space is ideal.
15. Keep a sense of humor.


To order your copy of Remodeling Hell, CLICK HERE
For more information about Remodeling Hell, CLICK HERE
For more information about the Summit Murder Mystery series, CLICK HERE
Follow me on TWITTER
Friend me on FACEBOOK
Follow me on PINTEREST

Monday, October 6, 2014

How to Deal with a Bad Contractor

How to Deal with a Bad Contractor

  • Building Home Construction Worker Carpenter 01
    Reuters
It seems like everyone has a horror story when it comes to their home remodeling or repair experience.

According to a recent survey by referral website Angie’s list, 52% of the more than 12,000 home owners polled reported problems with their contractor. What’s more, 27% were so unhappy they fired the professional before the job was complete.

While the reasons for the unhappiness varied from contractors who made a mess to ones that took too long to complete the work, there are ways to avoid having your next home improvement project end up in small claims court.

“It all starts with how you go about the hiring process,” says Paul Sullivan, chair of National Association of Home Builders Remodelers and a remodeler. “Doing your due diligence is the best way to not only protect yourself, but ensure a positive remodeling experience.”

Before starting the search, ask for referrals from friends and family. Sullivan also recommends contacting your local builders association to get a list of members. You should also ask potential candidates for references and verify they are properly licensed.

Once you’ve created a list of three contractors, Angie Hicks, founder of Angie’s List, suggests meeting with them in person to make sure your personalities mesh.

“There’s no sense in hiring someone you can’t trust from the get-go. Let’s face it: There may be wrinkles along the way and you want to feel comfortable addressing them,” she says.

Equally important to who you hire is how the contract is crafted. Hicks says homeowners should spend “a good amount of time” negotiating a contract that outlines all expectations as well as a payment schedule.

The contract should also include the process to change the order even if you are using custom materials or products. What’s more, experts say you want to make sure there is a termination clause and an explanation of what will happen if both parties have a dispute. Sullivan says he puts an arbitration clause in all his contracts to cover disputes. “An arbitration clause is not a bad thing to have in there; rather than going to a full blown lawsuit where everybody loses,” he says.

Taking precautions upfront is going to lessen you’re risk but it doesn’t mean something won’t go wrong. But before it gets ugly or you fire your contractor, experts say to communicate regularly about what you want and what you are unhappy with.

“One of the biggest causes of contractor disputes is a lack of communication during the project which winds up leaving the homeowner less than satisfied with the results,” says Brooke Gabbert, a spokeswoman for referral Website , HomeAdvisors www.homeadvisors. “Often, these miscommunications can be avoided all together by setting up a short daily meeting with a designated member of the crew performing the work where you can discuss progress and possible delays.” The meetings keep you in the loop and quickly alert the contractor to any problems or concerns. Lack of communication allows anger to fester and can lead to bigger problems.

If you end up unhappy with the final product and your contractor refuses to fix it before, experts say it might be time to turn to ligation or social media.

Online reviews are very powerful, and you airing your grievances could encourage the contractor to fix the work. However, Sullivan says to always be honest about what happened, adding that there’s a lot of unfounded “abuse” of contractors on review sites. Don’t make up things to make the contractor look worse or go on an emotional rant because it will only hurt your reputation if the dispute ends up in litigation.

“You can file a complaint with the BBB. If he’s a member of BBB that might mean something. If he’s not, he probably doesn’t care,” says Sullivan. “If you hire him through a [referral site] and he gets slammed, that will affect the next project he has in the pipeline and he will probably respond.”


To order your copy of Remodeling Hell, CLICK HERE
For more information about Remodeling Hell, CLICK HERE
For more information about the Summit Murder Mystery series, CLICK HERE
Follow me on TWITTER
Friend me on FACEBOOK
Follow me on PINTEREST

Friday, September 19, 2014

Keep Your Budget On Track!


25 Tips to Keep Your Budget on Track

Follow these budget tips for remodeling, decorating, and design ideas to update your space without breaking the bank.


You would never spend thousands of dollars on a car without researching the type of vehicle you need, selecting the features you want, and haggling with the salesperson for a fair price. Nor should you embark on a remodeling or decorating project without doing the same sort of legwork.

Here are 25 tips that are sure to keep your budget on track.

1. Brake for garage sales. One person's junk can be a do-it-yourselfer's treasure. Never pass a garage sale or antiques store without stopping, especially when you're on vacation or passing through a neighborhood other than your own. Keep an eye on neighbors' curbside trash piles for great castoffs.
2. Look for local outlet stores or wholesalers. They can be sources for buying plumbing supplies, kitchen goods, tile or stone, and other specialty items at huge discounts.
3. Utilize the Internet. Auction sites can help you comparison-shop for the best price on used furniture and other goodies, as well as bid on the items of your dreams. Some sites also offer free design advice and Q&A forums that allow you to post a question about a decorating or remodeling dilemma and read others' responses.
4. Scout out unwanted items. Snag overstocked or misordered items for a fraction of retail. Ask builders what they do with leftover materials, such as windows and flooring, or check out www.buildersexpress.com to bid on excess building materials.
5. Seek cheaper alternatives. If your heart is set on granite countertops, opt for tiles instead of a slab. If you plan on painting your new molding, choose urethane over stainable wood. Rather than costly hardwood wainscoting or paneling, search for wallpaper that mimics the look of wood.
6. Don't be afraid to bargain. Appliances with scratches or dents can be had at huge savings. Discontinued items, such as fabric, are often marked down dramatically, as are display models of sinks, faucets, and cabinetry. Offer to purchase them, and you might get a discount. Make sure to ask about the return policy before you buy.

7. Barter for materials or labor. Offer your skills in return for someone else's. For instance, pitch in during your brother's painting project in exchange for his assistance with yours.
8. Stick with standard sizes and models. Custom kitchen cabinets, for example, are very expensive. Save money by choosing stock ones, then attaching molding, corbels, or wood carvings for flair.
9. Seek out free advice. Take advantage of design services—through computer-aided design (CAD) programs or from on-staff professionals—at local boutiques, garden centers, and home improvement stores.
10. Rent or borrow what you don't have. Check with neighbors and friends for miter saws and power drills. Home centers rent heavy-duty tools, such as tile cutters, power washers, and nailers, for a weekend fee (usually about $50).
11. Stay put. When redoing the kitchen or bath, keep the fixtures and appliances where they are and work around them. Not having to move plumbing or gas lines will keep costs down.
12. Refresh, don't replace. Touch up scratches on sinks, tubs, and appliances with spray paints specially formulated for appliances. Or, check the Yellow Pages under "Bathroom Remodeling" for companies that resurface tubs and sinks for less than the cost of new models. You can also cover a dated refrigerator or dishwasher with wood or stainless-steel panels; some companies, such as Frigo Design, stock standard sizes in kits.
13. Refurbish when possible. Update kitchen and bathroom cabinets or a piece of furniture, such as a hutch, by replacing the door panels with glass, fabric, or chicken wire. This option is less expensive than buying new cabinets or new doors.
14. Use expensive materials sparingly. Install stone tiles as a border around less costly ceramic. Upgrade the range in your new kitchen but opt for a cheaper refrigerator and sink.
15. Consider unconventional fabric. Sheets make great tablecloths, shower curtains, window treatments, and other fabric projects. Sheets are wider than most decorator fabrics, so they're ideal for tall or wide windows, and they come already hemmed. Or, consider burlap or terry cloth: Both lend a room texture and don't cost much.
16. Purchase plain, then embellish. Instead of splurging on expensive, patterned fabric for pillows or window treatments, purchase less costly solid-color fabric and dress it up with iron-on transfers, easy-sew appliques, or fabric paint.
17. Update the details without spending a fortune. Instead of buying a new dresser or kitchen cabinets, replace just the hardware. Pillows in trendy fabrics will refresh a tired sofa; fluffy new towels will liven up an old bath.
18. Paint can cover a multitude of sins. Revive furniture, flooring, and walls with a fresh coat of paint. Just be sure to prepare the surface by cleaning, patching, and priming before painting.
19. Find new uses for conventional things. Take a leisurely stroll through a hardware store or antiques shop and envision plumbing pipe as a curtain rod, old spoons as drawer pulls, vintage windows as screens or wall hangings, and an ottoman as a table.
20. Pull the furniture off the walls. Don't line the sofa, end table, and wing chairs along the perimeter of the room. Turning them on the diagonal is a free way to put a new perspective on a room -- and lets you visualize what items you need to complete the scheme.
21. Light it up. Strategic lighting is an easy—and inexpensive—way to change the look of a room. Use a floor lamp to illuminate a dark corner or to spotlight a colorful piece of wall art. A simple way to alter the mood is to replace your bulbs with lower-wattage models to create a dimly lit, intimate setting.
22. Deck the walls. You don't need pricey artwork. Frame inexpensive items, such as family photographs (especially in black and white), posters, pages from an old calendar, pressed flowers, a quilt, or vintage clothing.
23. Look outside for inspiration. Indoor-outdoor slate tiles, for example, are cheaper than the type used exclusively inside and are still attractive and durable. Pickets for fences make whimsical wainscoting, headboards, or mantel decoration. A wooden or metal trellis, when placed in a container of soil, laced with a climbing vine, and set on a sunny windowsill, stands in as a privacy-giving "curtain."
24. Cover up. Instead of reupholstering an entire sofa or chair, simply re-cover the cushions in coordinating fabric.
25. Work with what you have. Dishware inherited from your grandmother might make a dazzling display in a glass-front hutch. Lively quilts layered on a bed are a striking focal point to a bedroom.

To order your copy of Remodeling Hell, CLICK HERE
For more information about Remodeling Hell, CLICK HERE
For more information about the Summit Murder Mystery series, CLICK HERE
Follow me on TWITTER
Friend me on FACEBOOK
Follow me on PINTEREST