Thursday, October 23, 2014

Renovation Solutions: Tips for energy efficient homes in winter


It is that time of year again: time to start heating the house. Many of us hold out as long as possible, but the old “put on a sweater” or “grab a blanket” routine will only last a few more weeks at most! Our lovely fall weather can’t last forever.

Many people, especially homeowners living in older homes with outdated heating systems or poor insulation, find there is something to be desired when the heat kicks on.

Inefficient heating systems struggle on two levels. First, they don’t do a very good job keeping the house steadily warm and second, they cost more to run. A forced-air furnace or a boiler can be replaced without remodeling your home. However, during a major remodeling project, the mechanical equipment can be relocated as well as replaced, and the ductwork can also be reconfigured to add more ceiling height to some areas.

If you are adding square footage during a remodel, this will change the requirements of the heating system. Heating systems are designed based on the size of the house. A loose rule of thumb is that one forced-air furnace generally handles about 2,000 square feet. If you are expanding beyond that, a second unit may be required.

One of the most important parts of the heating system in a house actually has nothing to do with the mechanical heating unit. It's the insulation found in the home.

In a new home, insulation is added in the walls, attic/roof, under concrete slabs and in crawl spaces. Older homes were built with far less (or no) thought as to how to insulate these areas, so part of every remodeling project should be to update the overall energy efficiency of your home as much as possible.

Insulation is rated in R-values. R-value is the measurement that tells you how well your insulation will resist heat flow or heat transfer. The higher the R-value, the better the efficiency. The government’s energy conservation recommendations for R-values depends on climate and varies by ZIP code.

For most of Utah, the ceiling is recommended to have an R-value of 38, the mass wall R-value should be 19 and the floor R-value should be 30. Washington County, with its warmer climate, requires less insulation, with a required ceiling R-value of 30, mass wall R-value of 8 and floor R-value of 19. Up north in the Cache County, the numbers are slightly higher to combat the colder winters, with the recommended ceiling R-value of 49, mass wall R-value of 19 and floor R-value of 30.

Adding insulation to an existing house can be a do-it-yourself project for the ambitious homeowner or you can hire a professional insulation contractor. Either way, the first step is determining the extent of the existing insulation — not an easy proposition. If you have a brick home built before about 1950, there is essentially no insulation in your walls. Houses from the 1950s and '60s have minimal insulation. In the 1970s, efficiency became more important, though the technology of insulation has obviously improved over the last 40-some years.

Adding insulation to the older masonry home has to be done by adding rigid insulation to the exterior and resurfacing the house with another exterior material, such as stucco or cement fiber board; on the interior, you essentially need to build an new stud wall, add insulation and add new gypsum board (sheet rock).

For a wood-frame house, blowing insulation into an existing stud wall can be done by cutting small holes in between each stud. If you go to the extent of removing the interior sheet rock to add more or new insulation, the well-known pink fiberglass blankets are still available, but other options are being used more now — blown-in cellulose and sprayed-on foam are two of the most common.
While each type of insulation has its own pros and cons, the quality of the installation of the material is critical in the overall efficiency of the project.

Adding weather stripping around doors and windows is another way to keep heat from escaping during the winter. Just make sure as you make your home more air-tight and more energy efficient that you always address indoor air quality, too. Less air exchanges (of indoor air for fresh outdoor air) means a more efficient house, but may it may also risk compromising indoor air quality. You may need to add a unit called a heat recovery ventilator to pull more fresh air into your home as the exterior envelope gets tighter.

Older, inefficient windows are not much more than holes in your outside walls. Even the best windows have a much lower R-value than the surrounding walls, but double-paned insulated units which are properly installed and flashed will make a significant impact on your energy bill.
You have several window choices in terms of materials for the window frames, namely wood, vinyl or fiberglass. In addition to being maintenance free, there are many styles of windows from which to choose; these should obviously be coordinated with the style of your home.

Part of the charm of older homes is often found in their windows. For instance, many homes built in the first part of the 20th century have windows made of wood and leaded glass. These are high maintenance units that could hardly be less energy efficient, but they surely look terrific. One of our clients with fabulous original windows went to great lengths to preserve the look of the front of the house. With the help of a local company, the client actually sandwiched her existing leaded windows into a new window unit which preserved the look and updated the efficiency of the windows. This is a much better-looking and more efficient option than the outdated approach of adding storm windows when winter approaches.

Taking advantage of some or all of these updates will make winter more comfortable this year and your energy bill more affordable. Once you know the cost of one or more of these updates and the potential monthly energy savings, you can calculate a return-on-investment schedule to know when your break-even point will be. You can contribute to the health of the planet and make the approach of winter a much more pleasant thought by upgrading the energy efficiency of your home.

To order your copy of Remodeling Hell, CLICK HERE
For more information about Remodeling Hell, CLICK HERE
For more information about the Summit Murder Mystery series, CLICK HERE
Follow me on TWITTER
Friend me on FACEBOOK
Follow me on PINTEREST

Wednesday, October 22, 2014

William Shatner does Home Renovation

William Shatner stars in home-renovation show, how to use wood pallets safely and do you need replacement windows? 


shatner.jpgWilliam Shatner and his wife Elizabeth star in the DIY Network's newest celebrity home renovation series, "The Shatner Project."  
 
SHATNER RENOVATES HOME: Pop culture icon William Shatner is the star of the DIY Network's newest celebrity home renovation series, "The Shatner Project." The series, which

premieres on Thursday, Oct. 23, shows how Shatner copes as project manager of his own home remodeling.

Shatner and his wife Elizabeth renovate their 1970s-style California home, including turning the front patio area into the perfect place for big family parties, and remodeling the media room.

If you've used wood pallets for DIY projects, what are your best tips? Share in the comments.
The premiere episode features the Shatners, with the help of a designer and a construction crew, swinging sledgehammers to help demolish old cabinets, countertops and tile in their kitchen.
"The Shatner Project" premieres at 10 p.m.

USING WOOD PALLETS SAFELY:  Using wood pallets for DIY projects is popular right now because woodworkers like the rustic look of pallets, and usually they can be obtained for free. But there are risks, says Elmer's Glue, which makes wood glues.

Many pallets are treated with toxic chemicals, such as pesticides and fungicides. Pallets that were used to transport vegetables may carry germs; pallets that were stored outdoors could be infested with mold or insects. Here are some tips for using pallets safely from Elmer's, which makes wood glues:
 Determine if the pallet was chemically treated. Pallets that are used domestically are generally heat-treated or kiln dried and are the safest to use. Most international pallets are treated with chemicals. Do not use pallets stamped with MG for any projects or as firewood. Avoid colored pallets; they are frequently used to carry chemicals.

 If it looks as if chemicals leaked or spilled onto a pallet, choose another one. Don't use pallets stored outdoors for indoor décor items.

 Prep your pallet by scrubbing it with bleach and warm water outdoors. Allow it to dry completely.
Always wear gloves, dust masks and safety glasses while sanding pallet wood. Never use repurposed pallet wood in projects involving food, children's toys or children's furniture.

If you're not sure if a recycled pallet is safe to use, research local companies or Internet sources that sell new ones.

To order your copy of Remodeling Hell, CLICK HERE
For more information about Remodeling Hell, CLICK HERE
For more information about the Summit Murder Mystery series, CLICK HERE
Follow me on TWITTER
Friend me on FACEBOOK
Follow me on PINTEREST

Friday, October 17, 2014

Jennie Garth's Four Easy Tips to Decorate Your Home

PHOTO: Jennie Garth attends Watch What Happens Live, June 28, 2014.
Actress Jennie Garth is best known for having starred in the iconic “Beverly Hills, 902010,” but now she’s taking on home improvement. 

In “The Jennie Garth Project,” a series on HGTV, viewers follow along as the 42-year-old actress purchases a dated Hollywood Hills home and renovates it for herself and her three children.

 Garth appeared on “Good Morning America” on Thursday to share the knowledge she’s gained while remodeling her home. 

Here are some of her suggestions for sprucing up a home: 

Jennie’s Tips
1. Barn Doors. Interior barn doors add privacy without taking up floor space. They’re easy to install and can be done in just one weekend. You can use recycled or new doors to suit your budget, and you can choose traditional, rustic or contemporary hardware finishes to complement your style. You can chose either a single door that slides from one side to the other; a bi-parting door, consisting of two doors that meet in the middle; or a bypassing door, in which two doors are mounted inside a frame and slide one behind the other. 

2. DIY Medicine Cabinet. Medicine cabinets are a great way to solve storage situations in the bathroom, and they are easily installed, simple do-it-yourself projects. Choose a medicine cabinet that stands out in the same way that a piece of art does – especially if you consider adding a fun graphic pattern to the cabinet. Adding wallpaper inside a medicine cabinet also adds character and style. Check flea markets and garage sales for old medicine cabinets and spruce them up, then install them to enhance your space with vintage charm. You can also buy new medicine cabinets at a local home improvement or bath and bed specialty stores. 

3. Tile, tile, tile. Adding a glass tile backsplash to your bathroom is easier than you think, and it provides a way to bring contemporary class to any bathroom remodeling project. Consider using a laser level to save time on large tile projects, and, to personalize your project, add a tile border to complete the look. You can also revamp your existing tiles with tile paint and a grout pen. 

4. Custom Artwork. Create meaningful artwork that reflects your personality and life, and make sure to get your family involved so they can put their stamp on the space as well. Creating your own artwork is much cheaper than purchasing works from a gallery. Another idea is to get out some of your children’s old artwork, copy and enlarge it, and then frame it or decoupage it onto a canvas and display it in your home. 

To order your copy of Remodeling Hell, CLICK HERE
For more information about Remodeling Hell, CLICK HERE
For more information about the Summit Murder Mystery series, CLICK HERE
Follow me on TWITTER
Friend me on FACEBOOK
Follow me on PINTEREST
Wednesday, October 8, 2014

Survive A Kitchen Remodel

15 tips on surviving a kitchen renovation


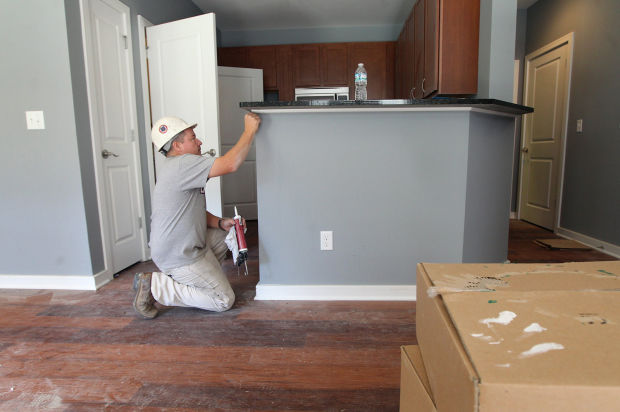
A kitchen remodel can be one of the most rewarding home improvement projects and also the most frustrating to endure.

Tearing out the heart of your home requires a plan for how to survive the weeks to months of construction ahead.

If your project is a basic tear out, plan on four to six weeks without much access to the kitchen, but if you're doing a significant renovation, expect at least three months of disorder.

Beyond the decision-making and budget-making are things many people don't prepare for: The overwhelming number of decisions required and eventual decision fatigue, hitting the wall on prepackaged or carryout meals and the emotional upheaval that comes with having the central part of your home upended for weeks.

You need a plan of how you will deal with the life details as well as choosing countertops, paint, cabinets, flooring, tile and so forth.

Here are best tips on how to survive.
1. Set up a separate, temporary kitchen.
If at all possible, move your current refrigerator to another room in the house, where you can still access it. Otherwise, get a small college fridge to keep the essentials. A spare microwave is also a critical appliance.
Be creative with small plug-in appliances such as a coffee maker or an electric skillet, which can be used to make anything from pancakes to Hamburger Helper on it, said Kim Feld, a kitchen designer with National Kitchen & Bath.
Consider getting a two-burner hot plate.
If most of your trash and recycling was collected in the kitchen, move temporary garbage cans to a place you can tolerate them. And be prepared to take out the trash more frequently.
2. Find a place in your home to eat.
Consider the family room, where you can set up the fridge and microwave.
3. Realize you'll have to wash dishes in the bathroom.
Try to keep a sink hooked up on your main level during construction.
4. Add the cost of eating out into the renovation budget.
Figure out how much your family typically spends on a meal eaten outside the house. Multiply this by the number of meals in a day and weeks the project may last. It's best to have a rotation in mind of reliable carryout and prepackaged microwavable meals.
5. Prepare for noise and dust.
"It is messy. It is disruptive, and it can get expensive. There is no way around that," Feld said.
Jon Kay, a manager at Signature Kitchen & Bath, said to expect day-to-day interruption. "Plan on there being a mess every day."
6. Consider your pets.
If you can ask a friend to take them, or have them kenneled, that might be best. If not, give them extra attention, as the off-limits room and noise will disturb them, too.
7. Get a sketch or design plans beforehand.
"Think about how the kitchen is going to work from a function level," Kathy Israel, owner of Accents on Cabinets, said. Also, think about where all your current kitchen items and appliances will fit into the new kitchen.
It's best to include a professional in this sketching stage so they can let you know potential pitfalls.
8. Also consider hiring a designer.
Designers can be hired by the hour to help guide choices. This can save money and regret down the line.
9. Hire a general contractor carefully.
A good relationship with the general contractor is crucial, Mike Beck at Beck/Allen Cabinetry, said.
This will be the point person you are spending the most time with, so find out about how often he plans to communicate with you. Will he text or email photos if you are out of town? How quickly will he return phone calls? The worst kitchen nightmares are those that involve a contractor who disappears or won't return calls.
In remodeling, there are probably 50 things that can go wrong, and if you have a good contractor, you may only know about two or three of them.
10. Be prepared for days when you don't see any progress.
Every decision in a construction project involves a timeline. So, there will be days of waiting — waiting for the countertops to be measured or waiting for the backsplash to arrive.
11. Order as much as possible before the job starts.
Don't start a project until all the decisions are finalized. As projects wear on, people tend to be stressed and don't have time to pick out details such as hardware quickly, which can slow down the entire project.
12. Expect some delays and cost overruns.
When you get the estimates, it's wise to add 20 percent to that number and ask yourself if you could still live with that number. If you don't have that cushion, think twice about proceeding.
13. Don't sweat the small stuff.
"Trust the people you've hired," said Jenny Rausch, president of Karr Bick Kitchen & Bath. Ask their opinions. Don't second-guess yourself. Don't agonize over the smallest details like hardware and countertop edges.
Keep a sense of perspective. Homeowners can get hyperfocused and paralyzed by decisions on the smallest details. Can you really remember what the hardware and edges in your friends' kitchens look like?
14. Get out of the house altogether.
If you can afford it, renting a short-term, furnished space is ideal.
15. Keep a sense of humor.


To order your copy of Remodeling Hell, CLICK HERE
For more information about Remodeling Hell, CLICK HERE
For more information about the Summit Murder Mystery series, CLICK HERE
Follow me on TWITTER
Friend me on FACEBOOK
Follow me on PINTEREST
Monday, October 6, 2014

How to Deal with a Bad Contractor

How to Deal with a Bad Contractor

  • Building Home Construction Worker Carpenter 01
    Reuters
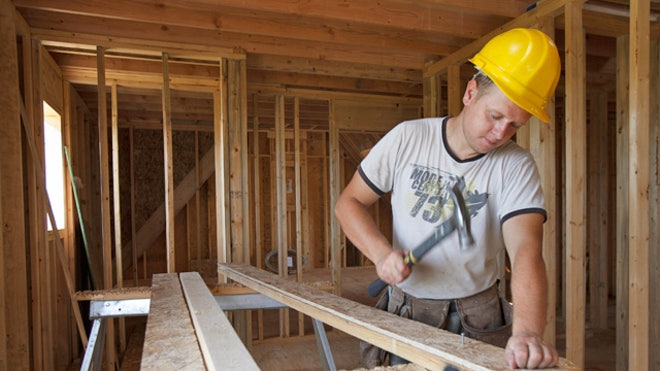
It seems like everyone has a horror story when it comes to their home remodeling or repair experience.

According to a recent survey by referral website Angie’s list, 52% of the more than 12,000 home owners polled reported problems with their contractor. What’s more, 27% were so unhappy they fired the professional before the job was complete.

While the reasons for the unhappiness varied from contractors who made a mess to ones that took too long to complete the work, there are ways to avoid having your next home improvement project end up in small claims court.

“It all starts with how you go about the hiring process,” says Paul Sullivan, chair of National Association of Home Builders Remodelers and a remodeler. “Doing your due diligence is the best way to not only protect yourself, but ensure a positive remodeling experience.”

Before starting the search, ask for referrals from friends and family. Sullivan also recommends contacting your local builders association to get a list of members. You should also ask potential candidates for references and verify they are properly licensed.

Once you’ve created a list of three contractors, Angie Hicks, founder of Angie’s List, suggests meeting with them in person to make sure your personalities mesh.

“There’s no sense in hiring someone you can’t trust from the get-go. Let’s face it: There may be wrinkles along the way and you want to feel comfortable addressing them,” she says.

Equally important to who you hire is how the contract is crafted. Hicks says homeowners should spend “a good amount of time” negotiating a contract that outlines all expectations as well as a payment schedule.

The contract should also include the process to change the order even if you are using custom materials or products. What’s more, experts say you want to make sure there is a termination clause and an explanation of what will happen if both parties have a dispute. Sullivan says he puts an arbitration clause in all his contracts to cover disputes. “An arbitration clause is not a bad thing to have in there; rather than going to a full blown lawsuit where everybody loses,” he says.

Taking precautions upfront is going to lessen you’re risk but it doesn’t mean something won’t go wrong. But before it gets ugly or you fire your contractor, experts say to communicate regularly about what you want and what you are unhappy with.

“One of the biggest causes of contractor disputes is a lack of communication during the project which winds up leaving the homeowner less than satisfied with the results,” says Brooke Gabbert, a spokeswoman for referral Website , HomeAdvisors www.homeadvisors. “Often, these miscommunications can be avoided all together by setting up a short daily meeting with a designated member of the crew performing the work where you can discuss progress and possible delays.” The meetings keep you in the loop and quickly alert the contractor to any problems or concerns. Lack of communication allows anger to fester and can lead to bigger problems.

If you end up unhappy with the final product and your contractor refuses to fix it before, experts say it might be time to turn to ligation or social media.

Online reviews are very powerful, and you airing your grievances could encourage the contractor to fix the work. However, Sullivan says to always be honest about what happened, adding that there’s a lot of unfounded “abuse” of contractors on review sites. Don’t make up things to make the contractor look worse or go on an emotional rant because it will only hurt your reputation if the dispute ends up in litigation.

“You can file a complaint with the BBB. If he’s a member of BBB that might mean something. If he’s not, he probably doesn’t care,” says Sullivan. “If you hire him through a [referral site] and he gets slammed, that will affect the next project he has in the pipeline and he will probably respond.”


To order your copy of Remodeling Hell, CLICK HERE
For more information about Remodeling Hell, CLICK HERE
For more information about the Summit Murder Mystery series, CLICK HERE
Follow me on TWITTER
Friend me on FACEBOOK
Follow me on PINTEREST