Monday, December 31, 2012

Common Sense Safety Tips for DIY Home Projects

It’s important to keep up with home maintenance jobs in order to protect your home investment and have a safe living area. Many of these maintenance jobs also save money when you do-it-yourself. It’s important, however, to follow a few common sense safety precautions.


For instance, keep your work area neat. Don’t allow power cords to tangle and pick up and properly store power tools, sharp tools, or dangerous materials that might cause injury. And keep tools and supplies away from the reach of small children.


Dress appropriately for these do-it-yourself projects. For instance, wear sturdy clothing, work boots, and gloves to help protect you as you work. Be sure to wear safety glasses whenever you use power tools, hammers, or other striking or cutting tools. If you’re sanding wood or wallboard joint compound, wear a dust mask to avoid breathing the dust and fibers. If you’re working with hazardous chemicals and materials, a certified respirator is a must.


Before using any power tool, be sure to read and follow all precautions given in the manual. Always unplug the tool before servicing it, making adjustments, and when you’re finished using it. It’s also safety wise to keep all drill bits, blades, and cutters sharp since dull tools require extra force and makes them more dangerous to use.

Whenever you’re using a ladder, be sure to position it on a flat, firm surface. As you climb or reach, keep your weight centered and avoid standing on the top two runs.


Last but not least, keep a good first-aid kit on hand.


Good luck to all starting new home projects in the New Year!

To order your copy of Remodeling Hell, CLICK HERE
For more information about Remodeling Hell, CLICK HERE
To order a copy of my new book Murder on Kilimanjaro, CLICK HERE
For more information about the Summit Murder Mystery series, CLICK HERE
Follow me on TWITTER
Friend me on FACEBOOK
Connect with me on LINKEDIN
 
Article source: newsdemocratleader.com

Wednesday, December 12, 2012

10 Tips to Help You Focus on Home Projects


Tools


If you have a home, I guarantee that you have home improvement projects to do. Whether relating to season, maintenance, upgrades, or repairs, there is rarely a time when the list is empty. Some of us find the motivation to complete home projects easily, while others stop, start, re-start, or generally procrastinate. There are a variety of reasons why you might have trouble following through on projects. Not surprisingly, many of them are emotionally based. Sometimes you have to do some inner work before there is a prayer the outer work will actually be completed. Here are a few tips, both psychological and practical, to help you focus and follow through on projects.


1. Look at why you are doing the project to begin with.
“There is a conflict inherent in what we want and what we think is OK,” said Kevin Blanchard, MSW, who practices in Greenfield, MA. Blanchard said that people can have many reasons for wanting to do a project, one of which is to give others a certain impression of you or you feel you must to make your partner or others happy. “Some people want to be seen as someone who has freshly painted walls. Or is it your wife or mother’s idea? You have to ask yourself what you really want to do,” said Blanchard.

2. Prioritize.
“Thinking on paper and on a calendar is helpful when you have a list of projects,” said Marek Tresnack, LMHC, who also has a practice in Greenfield, MA. “Set up a plan for a month, a week, and a day,” he said.

Another idea in terms of prioritizing would be to make your list based on whether it’s a critical safety issue, routine, has a specific time-line, such as creating a room for a new baby, or would simply improve the value or look of your home.

3. Be realistic regarding your skill-set.
I don’t think I’m alone in the notion that in order to save money, I have to do just about every project in the house myself. Yes, I’ve even managed a lot with the help of detailed books on repairs, but there is a point where you simply need to hire a professional, especially for code-heavy or dangerous work like electrical work. You will save time, money, and a great deal of stress. A colleague of mine who lives in New York City hired a plumber recently to do some work that she just couldn't do herself after wasting hours trying to DIY the job. It was worth it; she's no longer showering in ankle-deep water.

4. Pace yourself, multi-tasking doesn’t always get more done faster.
Tresnack said that when beginning a project to try to  not create too many smaller tasks.  “Even the most multi-tasking CEO’s focus on one thing at a time, following through without letting anything disrupt them,” he said. Tresnack said that the mind compartmentalizes each task and each time we fully complete a task, a part of our mind can relax. “When you have accomplished something the mind can breathe, rest, and let go of it. It’s like having too many Windows open on your computer, your mind gets slower and slower,” he said.

5. Become “prevention focused.”
“Prevention focus is a term psychologists use to describe what happens when you think about your goals in terms of what you might lose,” said Dr. Heidi Grant Halvorson in her blog “Peeling back the Onion.”

“Study after study shows that when people think about their goals in terms of what would happen if things go wrong, they procrastinate less,” said Halvorson.

6. Have attainable goals.
Similar to prioritizing, assessing your resources carefully, including your time, and prior to starting a project, will help flesh out what’s realistic. I’ve learned that when I lay out what’s really needed in terms of materials, time, and cost, I’m able to then have a clearer vision of the project, which tends to reduce what I think of as the “looming” aspect of the project and it becomes easier to move forward. Having attainable goals also helps me budget my time, another resistance-reducer.


7. Try to avoid perfectionism.
Perfectionism can lead to the noblest cause of procrastination. When I have created an image of not only what, but how much needs to be done, I’ve sometimes become too overwhelmed to actually do the project. Case in point, I had a room that had wallpaper I hated. In peeling off the wallpaper, the backing was left behind. In a 100-year-old house with plaster walls, getting the backing off and the room skim-coated and painted ended up taking nearly three years. In wanting it perfect right away, I just couldn’t get started.


8. Let go of the fear.
For those of you who are inclined towards introspection, Tresnack recommends sitting down before you start a project and try to focus on what about the project may be making you afraid. “If you are procrastinating, sit for a moment and look at what your fears are about the situation. You may even want to write about it,” he said. Tresnack said that procrastination creates an “emotional cloud, which makes things harder to accomplish.”

9. Celebrate your successes.
“Every time we accomplish something it gives our mind a little boost,” said Tresnack. It’s important to stop and relish what we have accomplished before moving on to the next project. If you feel more satisfaction, the next project may feel more enjoyable.

10. Make projects into social events.
There are always a lot of small projects that need to be done. But for the bigger projects, make it an excuse for a party or a date with your significant other. Having a work a party is not a new idea, but it’s a fun one. Not only can you get the project done faster, but you can build on the feeling of making work seem less like work.


To order your copy of Remodeling Hell, CLICK HERE
For more information about Remodeling Hell, CLICK HERE
To order a copy of my new book Murder on Kilimanjaro, CLICK HERE
For more information about the Summit Murder Mystery series, CLICK HERE
Follow me on TWITTER
Friend me on FACEBOOK
Connect with me on LINKEDIN
Subscribe to my YOUTUBE channe

Tuesday, December 11, 2012

Eight Tips for a Supremely Organized Winter Garage


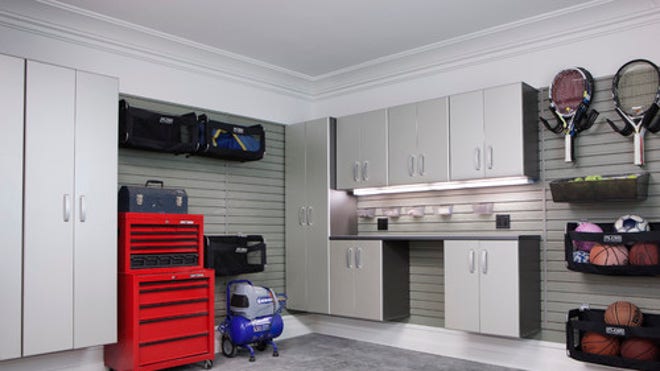
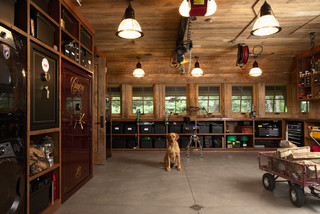
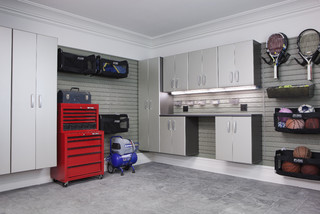
Houzz_FlowWall_eclectic-garage-and-shed.jpg

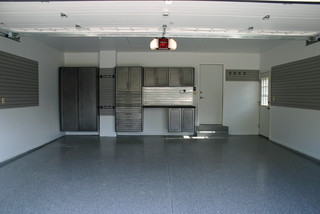
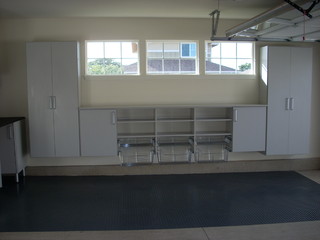
Mountains of snow on the horizon mean that shovels, snow blowers, skis and more are about to come out of the woodwork. Prepare appropriately for the daily use of winter equipment and gear by getting your garage in tip-top shape now. An organized garage that acts as a functional storage space will keep everything you need at hand, allowing you to move through chores and errands with efficiency and ease. Optimize your garage space by following the below tips from the pros.

Plan accordingly. Before you make any move, assess your space carefully. Even if you want to do the dirty work yourself, you may want to call in a professional simply to help you create a working vision. “You want to understand exactly what your personal storage requirements are, and then design your garage accordingly to fit your needs,” says Jeff Murphy, president of Murphy and Co. Design “It’s amazing what a good design can do to the quality of life in your garage.”


Avoid general floor storage. First rule of thumb: Keep the garage floor as clear as possible. “Snow melting off your car will make anything left out wet and muddy,” says Rozalia Kiss, design manager at transForm


Work your walls. Use all the wall space available; this not only keeps things off the floor, but also leaves optimal space for your car. “Consider a wall track system to hang shovels and other tools in an easy-to-reach place by the garage door,” says Kiss. “For heavy, bulky items such as winter sports equipment, install deep garage shelving with metal stiffeners.”


Look up for general storage. Running out of available wall space? Use the ceiling. “There are many great companies that specialize in simple garage storage, including overhead storage that can mount on your current ceiling,” Murphy says.


Consider creating a gear closet. Murphy suggests creating a dedicated sports or gear closet out of a room accessed directly from the garage. “These spaces are simply a larger closet with shelves and open storage, which works great for unloading kids’ sports items right from a vehicle into a room where it doesn’t matter if it becomes wet or dirty,” he says. “This room is typically heated the same as the house.”


Hang racks for skis and snowboards. “Mounting a ski or snowboard rack on the wall is a nice way to keep the clutter down in the garage,” says Murphy. “It allows for a dedicated location to keep them off the floor and out of the way of tipping over.”


Keep sand and salt at hand. Use sliding wire baskets or install a tilt-out hamper for easy access to sand, salt and even (well-wrapped) birdseed. “This also helps to keep them protected, stored and off the floor all winter long,” says Kiss.


Install motion-sensor-activated and battery-powered LED lights. You never know when a winter storm might challenge your power, so it’s best to be prepared. “Motion-sense-activated and battery-powered LED lights help you find supplies in the event of a power outage and can be easily mounted under cabinets to illuminate countertops, and installed in drawers and closets,” says Kiss

Article source: http://www.foxnews.com/leisure/2012/11/27/8-tips-for-supremely-organized-winter-garage/ 

To order your copy of Remodeling Hell, CLICK HERE
For more information about Remodeling Hell, CLICK HERE
To order a copy of my new book Murder on Kilimanjaro, CLICK HERE
For more information about the Summit Murder Mystery series, CLICK HERE
Follow me on TWITTER
Friend me on FACEBOOK
Connect with me on LINKEDIN
Subscribe to my YOUTUBE channel 

Monday, November 19, 2012

Remodeling Hell For Only $3.00!

For a limited time only Irion Books is offering Divorce Hell, Remodeling Hell, Autograph Hell, Car Dealer Hell and Roadkill Cooking for Campers for the cost of mailing ONLY in exchange for an honest review!

We are more than happy to send the book media mail, which would be $3.00.  If interested, just Paypal your $3 payment to uspark@cox.net and we will get the book out to you right away!


Learn the history of divorce and how you can save your marriage with Divorce Hell!


Autograph Hell will reveal the true story behind autograph collecting, how to avoid getting caught up in "authentication" schemes and how to collect the right way.


Car Dealer Hell is a book anyone should read before buying a new car.  Full of inside knowledge that will help you avoid pitfalls and traps and walk into your next car buying experience armed and ready to take on any car salesman!


Save thousands of dollars and headaches with Remodeling Hell.  Even if you aren't planning a home remodel in the near future, there are many home remodeling tricks that can help you save several months in repairs and construction.


Roadkill Cooking for Campers - The Best Dang Wild Game Cookbook is the funniest cookbook in the world!  Learn how to cook anything from a moose nose to just Indian bread!  This cookbook makes for a great novelty gift for the outdoors lover and/or camper in your life! 


If you have any questions, please contact my assistant Jennifer at jennifer@irionbooks.com

Tuesday, October 30, 2012

10 Tips to Winterize Your Home Now

Get ready for winter's chill and reduce energy costs by installing a programmable thermostat. (Photo courtesy of Angie's List member Bill K.) 10 Tips to Winterize Your Home Now

Get ready for winter's chill and reduce energy costs by installing a programmable thermostat. (Photo courtesy of Angie's List member Bill K.)

Fall is the perfect time to start thinking about preparing your home for winter. As temperatures begin to dip, your home will require maintenance to keep it in working order through the winter and beyond. Here are 10 tips to help you prepare your home for winter:

1. Furnace inspection: Inspect your furnace and clean ducts. Purchase furnace filters and change them monthly. Update to a programmable thermostat. Remove any flammable material from your furnace area.

2. Get the fireplace ready: Check the cap and/or screen the top of the chimney. Sweep the chimney, and inspect the fireplace damper.

3. Check doors and windows: Inspect exterior for crevice cracks and exposed entry points. Replace cracked glass in windows or entire windows. Remove summer screens. If you have storm windows, install them.

4. Inspect the roof, gutters and downspouts: Add extra insulation to the attic to prevent warm air causing ice dams. Check flashing to prevent water entry. Replace worn roof shingles or tiles. Upgrade with leaf guards on the gutters and downspouts extensions.

5. Service weather-specific power equipment: Drain gas from lawn mowers. Service snow blowers. Check snow shovels' condition.

6. Check the foundation: Rake away debris and vegetation from your foundation. Seal up entry points to keep out pests. Seal foundation cracks. Inspect sill plates for rot or infestation.

7. Install smoke and carbon monoxide detectors: Change detector batteries. Install carbon monoxide detectors near your furnace and water heater. Replace fire extinguishers older than 10 years.

8. Prevent plumbing freezes: Drain all garden hoses. Insulate exposed plumbing pipes.

9. Prepare landscaping and outdoor surfaces: Trim trees if needed. Plant spring bulbs and lift bulbs that cannot survive frozen ground. Seal driveways, brick patios and decks. Move sensitive potted plants indoors.

10. Prepare an emergency kit: Buy candles and matches for use during a power outage. Set aside drinking water, non-perishable food items, pet food, waterproof blankets, a battery powered radio, and a first-aid kit in a secure location.

To order your copy of Remodeling Hell in paperback or an ebook, please CLICK HERE
For more information about Remodeling Hell, CLICK HERE
Follow me on TWITTER
Friend me on FACEBOOK
Subscribe to my YOUTUBE channel!

Tuesday, October 23, 2012

Your Holiday Organizing Checklist

Holiday parties can be a blessing and a curse -- sometimes the prep can get overwhelming. Get started now by tackling this pre-party to-do list. Getting your infrastructure organized before all the activity begins will ease party prep later, and you might even start off the New Year organized, too.
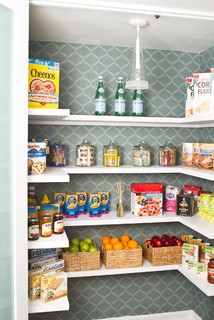
1. Organize your pantry. Whether you're hosting a party or having family stay for a few days, it's easy to spend a lot of time in the kitchen. Make cooking easier for all with a spic-and-span pantry. Clean out all those random boxes and cans, and organize items by type to make them easy to find.
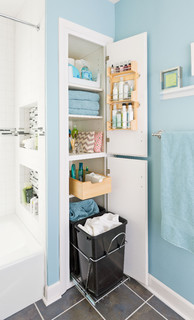
2. Clean out the linen closet. Make sure you have a neat and tidy space for guests to access towels, extra sheets and other necessary supplies. If you don't have a dedicated linen closet, clear out a space in a small closet or bathroom cabinet where overnighters can grab an extra pillow or towel without having to knock on your bedroom door.
3. Get your fireplace ready. For those lucky enough to have a fireplace, you'll want to make sure it's in tip-top condition for winter nights. Clean out your glass or louvers, and make sure a professional services your wood or gas fireplace before you get a roaring blaze going.
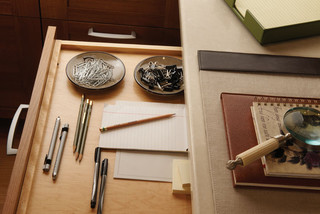
4. Declutter your junk drawer. Despite your efforts to keep your junk drawer hidden, the drawer's often prominent placement (near your front door or in the kitchen) means guests are likely to happen upon it at some point. Save yourself a little embarrassment and keep necessities at hand by getting your favorite junk drawer into shape.
5. Tidy up kids' spaces. Even though it might not stay clean for long, it's worthwhile to make the effort and get your children's play space under control before the holidays. Using organization techniques that'll encourage kids to put things away may help the space stay tidy -- at least until the end of the day.
6. Clean out your coat closet. It's time to get rid of those wire hangers and piles of snow gear to clear the way for visitors' outerwear. Don't forget to clean the space, too -- dust, sweep and give everything a good wipe down.
7. Organize the bathroom. Getting your guest bathroom ready for the holidays means more than doing just a quick wipe down. Make sure it's clean and organized so visitors can find what they need without having to dig through piles of old lotion bottles.
Use the holidays as an excuse to get your bathroom exactly how you want it -- toss out old beauty items, wipe down drawers and shelves and put hand towels and other necessities where they're easy to get to.
8. Double-check safety precautions. Keep first aid kits fully stocked, check smoke and carbon monoxide alarms and make sure your home is ready for rough weather. Guests will stay comfortable, and you'll have peace of mind.

To order your copy of Remodeling Hell, please click HERE
Friend me on Facebook HERE
Follow me on twitter HERE
To learn more about my Summit Murder Mystery Series, please click HERE


*article source:  foxnews.com

Monday, September 10, 2012

Fall Decorating Ideas For Your Home

Updating a living space can be easy and affordable with these simple design ideas from Mosaik Design and Remodeling.

Layered rugs.
Quote startLayer a new wool rug or animal hide on top of an existing rug and you create an entirely new look.Quote end 

The change in season often inspires change to indoor living spaces. This is especially true as fall approaches and more time is spent indoors. There are plenty of simple ways to update the feel of a space that don’t require a lot of time and money. Erin Davis, co-owner of Mosaik Design and Remodeling, a premier design and build firm in Portland, Oregon shares affordable home decorating tips to bring warmth and luxury into the home this fall:
  •      Layer and Texture: Layering and adding texture is an easy way to give a room a cozy feel, just as we would add a scarf or sweater to our wardrobe. Try a new wool rug or animal hide on top of an existing rug or add a handmade blanket or quilt on top of your comforter and you create an entirely new look. Bring in cozy, textural elements like velvet pillows or a cashmere throw and you add comfort and a touch of luxury to any room. Natural fiber wallpaper is another interesting way to bring warmth and texture to a space.

  •    Color: Introduce new colors into your palette that reflect the mood of the fall season. This can be with home accessories or a coat of fresh paint. For example, if soft blues and yellows dominate your décor, add greys, bronzes or dark chocolates to create an entirely new fall palette. If you have a neutral color scheme, try amethysts, wines, spicy reds or soft orange hues to add warmth and richness to your room. These warm, rich tones will evoke comfort year round. Try this method with a new entry rug, hallway runner, or window treatments. For something more permanent, introduce a high contrast color on cabinets, molding or a stair rail to make a high impact design statement that is sophisticated without breaking the bank. 

  •     Metalics: Bring in metallic tones to add elegance and a modern feel to your space. Gold, bronze and copper toned metals can bring warmth to your home. Metal toned nesting tables can make a wonderful addition if you entertain frequently and if space is at a premium. They can be placed in front of a sofa or chair and then stored away as a single end table when not in use. Lamp bases are another easy way to introduce metal tones. For something more dramatic, a pressed tin panel ceiling treatment is an unexpected way to introduce a metallic color.

  •     Fireplace: If you are looking for a more permanent change, remodeling a fireplace is a great way to freshen up an entire space. Fireplaces tend to be the focal point in a room so even a minor change can make a big statement. Re-painting the wood or brick on the fireplace is an easy, inexpensive way to update the room, while a complete overhaul of the mantle, hearth and firebox will create an even larger impact. If you have a wood burning firebox, consider converting to a gas fireplace and you will get much more use out of it. 

  •     Kitchen: The heart of the home gets its fair share of use in the cooler months. Put away summer dishes, glassware and get organized for family gatherings and entertaining in this area. Organize kitchen clutter by introducing a sleek bulletin board to keep track of kids’ activities and invitations or consider built in cubbies that can double as wine storage or to organize cookbooks. Also, don’t forget to clean your oven to set the stage for those amazing comfort foods like casseroles and pot pies.

For more information about Remodeling Hell, CLICK HERE
To order your copy of Remodeling Hell, CLICK HERE
To follow me on twitter, CLICK HERE
Please 'like' my Irion Books page on Facebook by CLICKING HERE


*article from prweb.com

Monday, July 2, 2012

11 Tips for Getting Your Project Started

Great article about getting that home project started that you may have been putting off for a while!


Thinking of tackling a remodeling project? Big or small, there are a few things you need to know first. If the job seems a little too involved for your skill level, hiring a contractor can save stress and time. Don Reynolds, owner of Reynolds General Construction, gave us some tips for hiring one. If the job is something you’re confident you can handle, Rollie Clarkson, owner of Remodeling Construction, gave some tips for that, too.

1. Is the job something you can do? “When you hire a professional, they know how to surgically take something apart and put it back together,” Reynolds said. Rather than ripping down a wall and then discovering the plumbing needs to be rerouted, they’ll assess the possible hurdles before they make a mess.

2. How experienced are you with home projects? “Be realistic about your skill set,” Clarkson said. “If you have no tools or experience, you’re setting yourself up for failure.”
If you’re naturally handy and/or have some construction skills , then give it a shot, he said.

3. Consider the age of your home. “A bathroom remodel in a house that was built in the 1980s can be finished quickly. If it’s an old house from the 1800s, you’ll probably have to take it clear down to the studs and redo the wiring and the walls, which could take close to a month,” Reynolds said. If your home is old, you’ll have to retrofit trim, windows and more to make everything fit. Suddenly, replacing the sink in your 1910 Victorian just got a lot more complicated.

4. Do your homework when hiring a contractor. Don’t just settle on the first contractor you find. “Get references from homeowners who have used their services,” Reynolds said. “Ask how capable their craftsmanship skills were, and how pleased they are with the results.” If a contractor seems shifty when you meet them, move on.

5. With painting, it’s all in the preparation. “It takes more time to prep a room than it does to paint a room,” Clarkson said. “Tape the woodwork, remove switch plates, patch cracks and holes.” He added that old popcorn texture on ceilings may crumble to the floor when you try to paint over it, creating a new mess, and a new project, since you’ll have to re-texture.

6. Have a well-stocked toolbox. Clarkson’s suggestions for tools to have: A tape measure, various screwdrivers, a few different types of pliers, a small pry bar and a utility knife. He also recommends a small hand saw or circular saw.

7. If it’s not right, make it right. Stay in touch with your contractor so both parties know exactly how you want the finished product to look. “Communicate full details of the remodel,” Reynolds said. “If it’s not to your standards ... ask them to change it. Don’t give up.”

8. Stick to your budget. A good contractor should give you options to help you stay within your budget. Don’t let them talk you into upgrades you can’t afford. “I help my customers by giving them an allowance for things, like the faucets, for example. If they choose a model that is more expensive than the allowance I suggested, I make it clear that money has to be pulled from another area,” Reynolds said.

9. Take a class. If you want a small lesson on painting, installing a door, or other small home projects, many big box home improvement stores offer classes on Saturdays. “They’ll show you how to set a toilet or paint a room,” Clarkson said.

10. You can rent what you need. A lot of big, expensive items can be rented for individual projects, so you don’t have to shell out the dough for a chainsaw, for example. Clarkson said to check with local rental or hardware stores to rent items like air compressors, tall ladders and saws.

11. A contractor can help with small jobs, too. If you don’t have the time or tools to complete handyman work, like painting and other small jobs, hiring a contractor could be a good solution, no matter where you are in the process. “We can pick up wherever you left off,” Reynolds said.

For more information about Remodeling Hell, CLICK HERE!
For more information about the Summit Murder Mystery series, CLICK HERE

Article source: http://dmjuice.desmoinesregister.com

Friday, June 29, 2012

Kitchen Cabinets

Exploring Your Door Style Options

Structure
The doors can be mounted in different ways, creating a distinct look to certain cabinet collection. The face frame is the part of the kitchen cabinets that make up the foundation. Overlay is the term used to describe how much of the face frame is visible, while the covered portion is referred to as the reveal.
  • Partial overlay is the most common door style option where the doors are mounted on the face frame, leaving one inch of reveal.
  • Full overlay is designed to have the doors almost entirely cover the reveal. Though more common in frameless or “European” kitchen cabinets, this can also be seen in framed cabinet units. Hinges are concealed and less than an eight of an inch is left between one door to another.
  • Inset is as door style option where the doors are attached within the rails and stiles,lying even with the front portion of the cabinet box. However, a common problem with this is that humidity and constant change in temperature can cause rubbing between the stiles and the door.
Form
Kitchen cabinets come in various panel designs that are made more interesting in an endless variety of rich finishes. Your door style options include:
  • Slab – which as the name suggests, display clean lines and simplicity.
  • Recessed panel offers a picture-frame look with its flat panel fixed within a mounting constructed with miter and tenon joints.
  • Raised panel features panels that generally measure between  ½ and ¾ inch in height, creating a bulging quality to the doors. This is then made more dramatic by a routed edge profile, making kitchen cabinets in this door style option truly elegant.
  • Curved panel showcases decorative raised panels that loop upward in gentle arches.
  • The cathedral panel can either be raised or recessed, with a cathedral-type arch crowning the door design.
  • Beadboard panel is typically found in recessed panels and makes use of routed beaded details to achieve a casual country look.
Depending on the architectural style of your home and kitchen, you can choose from different door style options to complement with the rest of the designs and décor, helping you achieve an overall look and feel that is tasteful. Perfect for modern set-ups, contemporary kitchen cabinets are made distinct by their simple, basic lines that make the collection appear sleek and streamlined. There are also designs that can be used for a variety of architectures from traditional, cottage, transitional or modern kitchens like Shaker and Mission door style.

For more information about Remodeling Hell, CLICK HERE!
For more information about the Summit Murder Mystery series, CLICK HERE


Article source: craftsmennetwork.com

Tuesday, June 19, 2012

Fun Kitchen Remodeling Tips for the Summer Season


Summer is a wonderful time for remodeling.  Everything looks so gorgeous and vibrant outside so your creativity gets inspired.  And because it’s hot and humid outside you don’t mind working inside one bit!  As an expert in custom home design and construction we have some excellent kitchen design ideas to boost the look of your kitchen this summer.  This article outlines some our ideas on how to make your kitchen extra inviting for you, your family and friends.

Add a new stove
One sure way to revamp your kitchen the summer is to add some new appliances, specifically a brand new stove, preferably one that’s professional grade.  Flank it with some brand-new counter tops and voila! You already have created a beautiful change!

Add an island
One great idea for a new island is to add an island with legs.  That way you have a shelf at the bottom and room to put your legs as you pull up some nice, custom-made stools.  This gives you excellent space as you eat and chat.

Stack your dishes differently
Another way to spruce up your kitchen is to mount a dish rack onto your wall close to your dishwasher.  This is a great way to make mealtimes move more smoothly and to create a nice aesthetic too.

Make breakfast a breeze
Another suggestion: create a special station just for breakfast.  You can add a Tambour door to elegantly conceal a breakfast cupboard, perfect for storing items like your toaster, jug and preserves.

Find a vintage sink
We love blending old with new.  An old vintage sink can be made modern and versatile with a new pair of faucet mounts.

Be particular, but smart with your lighting
When you’re adding new life into your kitchen design think in layers and avoid blasts of light which overwhelm your senses, especially early morning and late in the day.  Have spotlights in strategic parts of the kitchen where you’re tasking the most.

Make food part of your design
Experts say that food is the ultimate accessory so display yours nicely with some glass cabinet doors in your cabinetry.

Install cabinets
Cabinets can be the ultimate design feature in a remodeled kitchen.  Consider modular cabinets for storing bottles of wine and stemware.

Don’t forget the flooring
Much can be changed with a new, renovated kitchen simply by adding new flooring. Options run the gamut these days from eco-friendly products such as bamboo, which is excellent at reflecting light, to luxury flooring such as Walnut.  Engineered wood is excellent in any room where water frequently flashes to the ground. You can also try a rustic look with rustic flagstone.  Black and white checkered tiles can add a retro feel to any kitchen floor.

For more information about Remodeling Hell, CLICK HERE
For more information about the Summit Murder Mystery series, CLICK HERE

Article source: jdouglashomes.com