Showing posts with label DIY project. Show all posts

Tuesday, November 12, 2013

Top 5 Easy Holiday Home Improvement Projects

With the holidays and New Year right around the corner, now is a great time to start sprucing up your home for the arrival of your family and guests. Whether it’s a remodeling project, landscaping upgrade, or an interior renovation, these 5 quick and easy tips will 
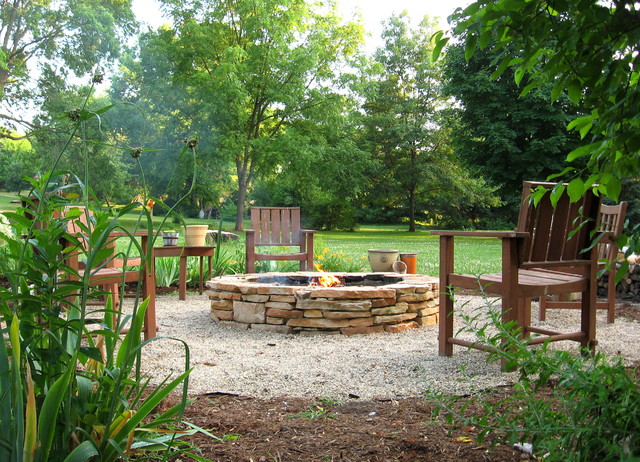
help get your home ready for the holiday festivities.


1) Keep Your Guests Warm and Your Energy Bill Low
Keeping your family and friends comfortable and warm is a priority when having guests over during the holidays. Adding some caulking or weather strips around drafty windows can help keep the heat inside your home. Also, upgrading your heating system to a new energy-efficient model can make a large difference in your energy bill this season.

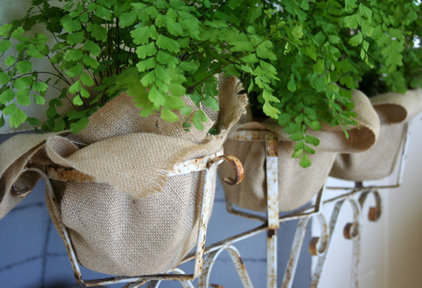
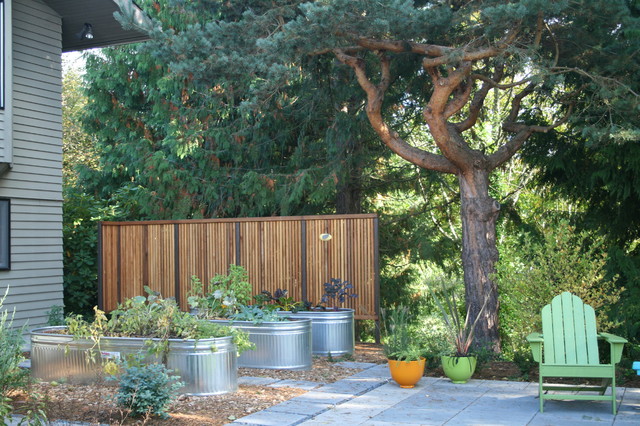
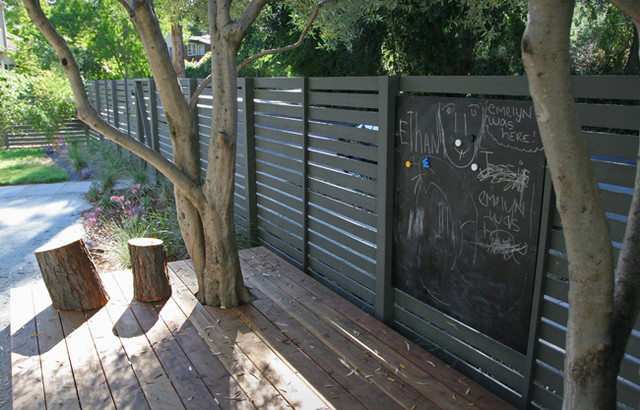
2) Landscaping & Entry Way Touch-Ups
Although the holidays may bring your family and friends indoors for celebration, your front yard and entrance way will be the initial things your guests will notice. Make a lasting first impression by planting flowers that bloom in the winter such as camellias, holly, and snow drops. This is an easy landscaping solution that will add color and shape to your front yard. Investing in a new front door or touching up the exterior trim with a fresh coat of paint are quick and easy ways to enhance the entry way.
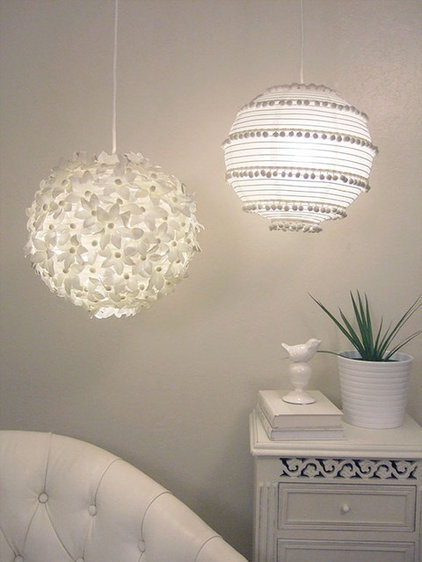
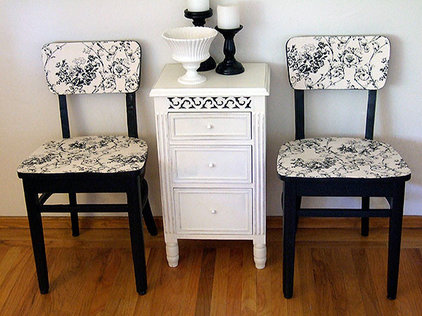
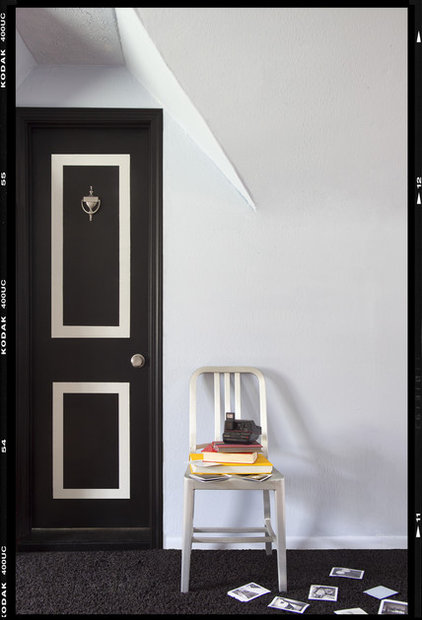
3) New Paint Job
A new coat of paint is a quick, easy, and cost effective way to brighten up a guest room or family room this season. Top winter paint shades are rich cedars and muted grays and whites.

4) Upgrade Your Kitchen
Since the holiday season is largely focused on food, you and your guests will be spending a lot of time in your kitchen. Updating old knobs and pulls on your kitchen cabinets is an inexpensive way to update the look of your kitchen. Adding in a new faucet is an easy DIY project and a great way to add some shine to your kitchen.

5) Get Organized
Organize all the items that may have accumulated throughout the year and start making space for all the new things you will be getting during Black Friday, Cyber Monday, and the holidays by installing a cabinet or a simple shelving unit in your garage or storage room.

To order your copy of Remodeling Hell, CLICK HERE
For more information about Remodeling Hell, CLICK HERE
For more information about the Summit Murder Mystery series, CLICK HERE
Follow me on TWITTER
Friend me on FACEBOOK
Follow me on PINTEREST

Tuesday, June 19, 2012

Fun Kitchen Remodeling Tips for the Summer Season


Summer is a wonderful time for remodeling.  Everything looks so gorgeous and vibrant outside so your creativity gets inspired.  And because it’s hot and humid outside you don’t mind working inside one bit!  As an expert in custom home design and construction we have some excellent kitchen design ideas to boost the look of your kitchen this summer.  This article outlines some our ideas on how to make your kitchen extra inviting for you, your family and friends.

Add a new stove
One sure way to revamp your kitchen the summer is to add some new appliances, specifically a brand new stove, preferably one that’s professional grade.  Flank it with some brand-new counter tops and voila! You already have created a beautiful change!

Add an island
One great idea for a new island is to add an island with legs.  That way you have a shelf at the bottom and room to put your legs as you pull up some nice, custom-made stools.  This gives you excellent space as you eat and chat.

Stack your dishes differently
Another way to spruce up your kitchen is to mount a dish rack onto your wall close to your dishwasher.  This is a great way to make mealtimes move more smoothly and to create a nice aesthetic too.

Make breakfast a breeze
Another suggestion: create a special station just for breakfast.  You can add a Tambour door to elegantly conceal a breakfast cupboard, perfect for storing items like your toaster, jug and preserves.

Find a vintage sink
We love blending old with new.  An old vintage sink can be made modern and versatile with a new pair of faucet mounts.

Be particular, but smart with your lighting
When you’re adding new life into your kitchen design think in layers and avoid blasts of light which overwhelm your senses, especially early morning and late in the day.  Have spotlights in strategic parts of the kitchen where you’re tasking the most.

Make food part of your design
Experts say that food is the ultimate accessory so display yours nicely with some glass cabinet doors in your cabinetry.

Install cabinets
Cabinets can be the ultimate design feature in a remodeled kitchen.  Consider modular cabinets for storing bottles of wine and stemware.

Don’t forget the flooring
Much can be changed with a new, renovated kitchen simply by adding new flooring. Options run the gamut these days from eco-friendly products such as bamboo, which is excellent at reflecting light, to luxury flooring such as Walnut.  Engineered wood is excellent in any room where water frequently flashes to the ground. You can also try a rustic look with rustic flagstone.  Black and white checkered tiles can add a retro feel to any kitchen floor.

For more information about Remodeling Hell, CLICK HERE
For more information about the Summit Murder Mystery series, CLICK HERE

Article source: jdouglashomes.com

Thursday, June 14, 2012

Beat the Heat


Many homeowners have already begun sweating the inevitable increase in their electricity usage that arrives along with warm summer weather. In addition to the longer days and more frequent thunderstorms most regions experience every summer, the Farmer's Almanac is predicting record high temperatures across the country in 2012. The combination of those factors can wreak havoc on a home during summer months, and Power Home Remodeling Group, the nation's fourth largest home remodeling company, offers homeowners tips for protecting both their homes and their wallets by saving energy this summer.
 
"So many homeowners dread their high energy bills during the summer months without realizing there are a multitude of common sense solutions that can help increase their home's energy efficiency," says Matt Hess, Power's VP of Operations-Installations. "The beauty of these steps is that they are not only extremely simple to implement, but they also defeat the negative effect heat can have on a home — and a wallet."

Power offers the following tips to make your home more energy efficient during the hot summer days and nights:
  • Cut down your AC usage by turning the thermostat up during the daytime hours when no one is home, or consider installing a programmable thermostat.
  • Replace air conditioner filters every month to increase your unit's efficiency and productivity.
  • Use ceiling fans to circulate cool air but remember to turn them off when leaving the room.
  • Plant trees or shrubs to shade AC units, but make sure they don't block the airflow.
  • Run dishwashers and clothes dryers at night to reduce heat production in the home during the hottest hours of the day.
  • Install door sweeps on the bottoms of all doors leading outside so that they lightly graze the existing threshold and keep hot air outside, and cool air in.
  • Place electronic equipment like televisions and computers away from thermostats where the heat they produce could cause the AC to run overtime. Likewise, position the thermostat away from direct sunlight which can cause it to read a higher than actual temperature.
  • Keep shades and blinds closed during the day to block out the sunlight and keep the house cool.
  • Close any AC intake vents that are low to the floor and open those that are high on the wall to ensure warmer air is cycled back into the home through the AC system.
  • On the hottest days of the summer, switch the fan mode on your thermostat from "auto" to "on" to continuously cycle the air and make the temperature on all floors feel consistent.
  • Seek out drafts around kitchen and bath vents, doors, windows and outlet covers with the help of a stick of incense. Light the stick and wave it slowly in front of those areas to see where the smoke is drawn out. Repair any leaks by sealing with caulk or weather stripping and replacing trim.
  • Avoid using the oven on very hot days. Instead, cook using an outdoor grill or microwave.
  • Investing in new doors and energy efficient windows can protect window treatments, floors and furniture from fading due to sun damage. Look for windows featuring Heatshield low-E glass that is much more efficient at keeping heat and humidity at bay.   
  • Swap old lightbulbs out for energy efficient, compact fluorescent bulbs that emit a brighter light and last longer.
  • Secure loose shingles, replace damaged sections of the roof and gutters and clear gutter blockages to prevent ultimate gaps and holes that can lead to leaks and the escape of cool air.
  • If replacing a roof, consider using pale-gray shingles as they will attract less heat than darker shingles.
In addition to these tips, energy and savings-conscious homeowners can conduct a home energy assessment through a do-it-yourself energy review or by hiring a licensed company. By seeking out air leaks and inspecting insulation, lighting and heating/cooling systems, homeowners can easily target the energy-sucking culprits around their homes and determine solutions.

For more information about Remodeling Hell, CLICK HERE
For more information about the Summit Murder Mystery series, CLICK HERE

*article from supplychaindigital.com

Tuesday, May 8, 2012

10 Terrific DIY Home and Garden Projects

It has been a while since I've posted some DIY projects, and I came across these and thought I would share!  Add Spring panache inside your home and out with these engaging DIY projects for all skills levels.  From fixing up roadside furniture to installing an edible container garden and building a stone fire pit, these 10 DIY projects for the home and garden are for both newbies and pros!


Project: Painted quotation
Difficulty: Easy
Estimated time: 1 hour

The book Flea Market Chic by Liz Bauwens and Alexandra Campbell features a quote painted on the wall above a bed's headboard. You can easily re-create this poetic look with a small can of paint and a set of letter stencils — or very good handwriting.


  Project: Burlap-wrapped pots
Difficulty: Easy
Estimated time: 15 minutes

Jennifer of The Old Painted Cottage covered basic pots with burlap to enhance her maidenhair ferns. Buy a roll of burlap at a garden store, cut a section that fits your pot and place the stylishly covered pot in a plant stand. You can also finish the look by tying the burlap with twine.
Project: Two embellished paper lanterns
Difficulty: Easy
Estimated time: 20 minutes to 2 hours

Monica Ewing of Crafty Nest whipped up these delightful paper globe lanterns with nothing more than a glue gun and embellishments from a craft store. The flower design takes a bit more time, but you can finish the pom-pom creation in just minutes.

See the full instructions here
Project: Container garden
Difficulty: Easy
Estimated time: An afternoon

Want an edible garden in raised beds but don't have the time or desire to do major construction? Take a cue from the folks at Banyon Tree Design Studio and fill galvanized troughs (yes, the kind livestock drink from) with soil and compost, and use them as containers to plant your seeds.
Project: Reclaimed dining chairs
Difficulty: Moderate
Estimated time: 2 days (including drying time)

Monica Ewing of Crafty Nest scooped up these chairs for free on the side of the road and transformed them with black paint and decorative fabric.

This is a no-sew project, so it's even appropriate for newbie DIYers. Read the full details and how-to here.
Project: Stenciled rug
Difficulty: Moderate
Estimated time: 2 days

Upgrading a sisal rug with a modern print creates a fresh look that's inexpensive. Read more about this project here.
Project: Outdoor chalkboard
Difficulty: Moderate
Estimated time: 2 days

Shades of Green's portfolio on Houzz inspired me to research outdoor chalkboard DIY projects. I discovered the perfect method: Mix outdoor paint with a dark sanded grout and apply it to a sheet of plywood for a version that will hold up against the elements. Get the full how-to here.
Project: Front-door face-lift
Difficulty: Moderate
Estimated time: 2 days (includes drying time)

Designer Brian Patrick Flynn, aka the Decor Demon, upgraded a basic hollow-core door in a weekend with new hardware, fresh paint and crisp graphic design. It may look complicated, but with time and patience, even a beginner can tackle this project.

Read the full story with step-by-step instructions
Project: Placemat pillows
Difficulty: Moderate (sewing machine required)
Estimated time: Several hours

Living in a Nutshell by Janet Lee covers creative and budget-friendly projects for small spaces. Here's a genius tip from the book: Sew designer placemats together and fill with stuffing to create a pillow. Read the Houzz coverage of Living in a Nutshell for more ideas.
Project: Backyard fire pit
Difficulty: Hard
Estimated time: Several weekends (and helping hands)

If you are ready to bust out the power tools and do some heavy lifting, this stacked stone fire pit could be yours in time to enjoy warm summer nights. Erin Lang Norris did a wonderful job outlining step-by-step instructions, so if you decide to tackle this project, you are in good hands.
Source: www.houzz.com

To order your copy of Remodeling Hell, please CLICK HERE!
To read how you can help updating Remodeling Hell, please CLICK HERE
For more information about my Summit Murder Mystery series, please CLICK HERE!

Thursday, February 23, 2012

3 Musts in External Home Improvement

As a homeowner, it is your responsibility to keep your home looking as great as the day you first moved into it. Regular home improvement and maintenance will not only make living in it more comfortable, but it could also improve its market value and make it easier for you when the time comes to sell it.
3 Musts in External Home Improvement
Most homeowners fail to pay attention to the home’s exterior, spending time and money on interior home renovation and improvement projects. You should realize there is no way potential buyers will be motivated to look inside if they do not like what is outside. For this simple reason, you need to make an effort to change the way your home looks outside.

Here are some must dos:
Tackle your home garden
There is nothing which says comfortable and relaxing than a lawn full of well-maintained plants. You need to make sure your garden does not look like a jungle by taming the growth of the grass and other foliage. You should also have some sort of organization to make your garden a backdrop of your home and not the other way around. If gardening is not your thing, you can always hire a professional landscape artist to design your garden and after, you can handle the maintenance yourself.

Spruce up pathways walkways
Many homeowners tend to neglect the paths leading from the road to the house. You need to check whether or not you need to fix it up or simply clean it up. If you do decide to renovate them, make sure your choice of material is both affordable and easy to maintain as well as appropriate for the area. You can choose stones, concrete, bricks or tiles.

Give your home a facelift with fresh coat of paint
You will be surprised at how painting your home’s wall can make such a huge difference. This is perhaps the easiest home improvement project you can tackle and it will not even cost you much. But if you think all your walls need is a good scrubbing to get rid of the moss and other stains, be sure to use a high pressure water hose.

To order your copy of Remodeling Hell, CLICK HERE!

*article from e-forclosuresearch.com

Friday, January 27, 2012

DIY Project - Making an old brass chandelier look new again!

How to Modernize a Traditional Brass Chandelier

With a few simple steps, take an old brass chandelier from old, fussy and formal to functional, fun and fresh.
+

Materials Needed:

  • brass chandelier
  • painters' tape
  • can of spray primer
  • 3 cans of spray paint
  • snap-on spray paint can handle
  • sheet plastic
  • globe chandelier bulbs


Prep for Paint

Protect floor and surrounding areas with plastic sheeting. Use a damp cloth to wipe dust from chandelier, remove socket sleeves then cover sockets with painters' tape.

Prime Surface

Shake can of spray primer for one minute then attach snap-on handle to can's top. With can six inches from surface, lightly pull spray handle back and prime chandelier using controlled pressure on handle. Prevent drips by covering areas to be painted with an even coat of primer, being careful not to spray one area for too long. Allow primer to fully dry for approximately one hour.

Add Finish Coat

Shake can of spray paint for one minute, then attach spray handle to top. With can six inches from surface, lightly pull spray handle back creating controlled, overlapping strokes. Allow up to an hour for first coat to dry, then apply final coat.

Insert Globe Bulbs

Remove painters' tape from sockets, slide sleeves into place then screw in globe bulbs.


To order your copy of Remodeling Hell, CLICK HERE!

*DIY project from HGTV.com

Wednesday, January 25, 2012

DIY Project - How to Make Chalkboard Kitchen Canisters

DIY (do it yourself) projects are very popular.  Along with informative home remodeling posts, I thought it would be fun to start including some popular DIY projects for your home.  Today's post is making chalkboard canisters.

Glass canisters are practical, inexpensive and readily available, but can be a bit boring. Chalkboard paint and an easy-to-apply stenciled detail will transform them into a unique accessory for any kitchen.

Materials Needed:

  • glass canister(s)
  • flexible measuring tape
  • painters' tape
  • glass-etching cream
  • 1" paint brush
  • chalkboard spray paint
  • square or rectangular stencil that fits canister
  • 2" foam brush
  • latex or acrylic craft paint

Clean Canister

Clean each glass canister with soap and water then thoroughly dry with a clean cloth or towel.

Measure and Tape

Using painters' tape, make a square on the outside of the canister to the dimensions of the stencil. Make sure the taped-off area is level and centered on the canister. Tip: A flexible measuring tape used for sewing will be easier to use on the curved surface of the canister than a metal measuring tape.

Apply Etching Cream

Brush on a thick coat of etching cream inside the taped area using a one-inch wide paint brush. Etched glass will provide tooth for better paint adhesion. Follow manufacturer's directions for activation time and etching cream removal procedure. Remove painters' tape after rinsing the etching cream. Thoroughly dry canister with a clean towel. Tip: Make sure to use etching cream, not a product that frosts glass or only simulates etching.
 

Spray Chalkboard Paint

Apply clean painters' tape surrounding the etched area and cover the rest of the canister in newspaper to protect it from overspray. Using long, steady strokes, apply the chalkboard spray paint in a thin coat to prevent drips. Allow ample drying time, then apply a second coat in the same manner as the first and repeat a third time if needed for full coverage. Carefully remove paper and painters' tape before the last coat is dry.

Season Chalkboard

When the chalkboard paint has fully dried, rub a piece of chalk over the entire painted surface to season the chalkboard. This step will prevent writing from being burned into the surface. Clean chalkboard with a damp cloth and dry thoroughly.

Paint Decorative Border

Tape stencil into place. Dip a two-inch foam brush into acrylic or latex paint and remove excess on a paper towel, leaving just a small amount on the sponge. Using this dry-brush technique will reduce the risk of paint bleeding under the stencil. Apply paint perpendicular to the stencil surface in a pouncing motion. Carefully remove the stencil, lifting it directly off the canister, so paint doesn't smear. Tip: When using a stencil multiple times, rinse between uses. Allow time for paint to fully dry, then fill canister with kitchen staples and use chalk to label jar's contents.

To order your copy of Remodeling Hell, CLICK HERE!

*DIY project found on HGTV.com

Monday, January 23, 2012

Half Day DIY Project for Your White Kitchen Cabinets!

Distressed and Antiqued Kitchen Cabinets

Add cottage-style charm to white painted cabinets by distressing then applying antiquing glaze. This quick and easy project will give builder basic cabinets a custom look in no time.

+

Materials Needed:

  • rubber gloves
  • mocha-tinted antiquing glaze (available at most home improvement stores)
  • smooth cotton rags
  • painters' tape
  • sanding block
  • 80-grit sandpaper
  • small paintbrush
  • spray polyurethane

Clean Cabinets

Put on a pair of rubber gloves and wipe cabinet faces with a damp rag to remove surface dirt. Let the cabinets dry completely before moving on to the next step.

Protect Walls

Use painters' tape to protect the walls around cabinets. Glaze dries slowly, so there is usually time to clean up an accidental mark, but it's better to be safe than sorry.

Sand Edges

Using a sanding block wrapped in 80-grit sandpaper, sand raised edges and corners of each cabinet door and/or opening. Sand until the wood under paint is fully exposed.
 

Apply Antiquing Glaze

Add a small amount of antiquing glaze to a smooth, clean rag. Begin applying the glaze to the front or side of one cabinet in small, circular motions until you've covered the entire section. Tip: A small amount of glaze will go a very long way. It's better to start with too little glaze rather than too much.

Smooth Finish

Once the entire front or side of a cabinet has been covered in glaze, use a clean area of your rag and a very light touch to smooth out all the circular marks. Gently wipe the glaze in straight up-and-down or side-to-side motion until the desired effect is achieved.

Darken Edges

Using a small brush, add more antiquing glaze to the distressed parts of the cabinets and/or doors. It's OK to apply the glaze liberally in these places because some of it will be removed in the next step.


Remove Excess Glaze

Wrap a smooth, clean rag around your index finger and carefully wipe off any excess glaze that's accumulated outside of the distressed spots created in the previous step.

Distress Remaining Cabinets

Continue working, cabinet by cabinet, until every desired surface has been antiqued. Make sure to stand back every now and then to ensure the overall effect is consistent. When finished, let the glaze dry for at least 24 hours before sealing it.

Protect the Finish

Spray on a light coat of clear, non-yellowing sealer to protect the distressed finish from damage.  

Tip: It's very important to use a non-yellowing sealer as regular polyurethane will turn yellow if applied over white paint.

To order your copy of Remodeling Hell, CLICK HERE!  

*DIY project found on HGTV.com